

Best bike lights 2017
Darkness is descending. But it’s nothing dramatic – just the ordinary way of winter. So what matters to the ordinary bike rider? Simon Vincett investigates.
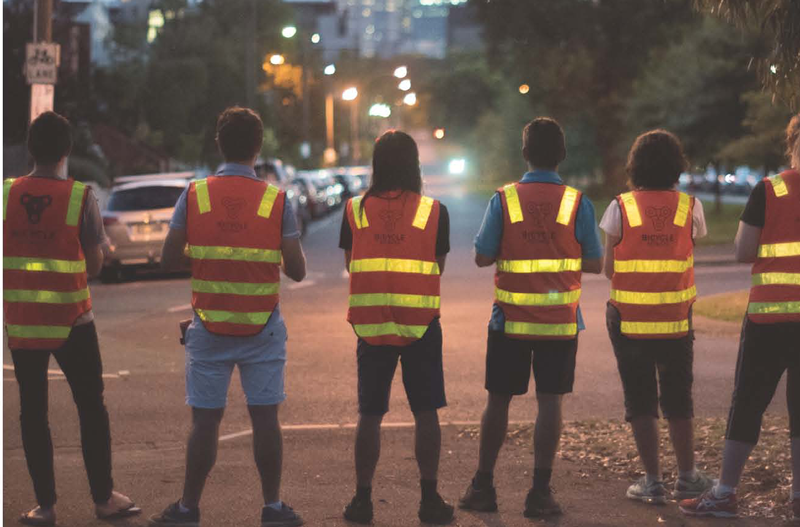
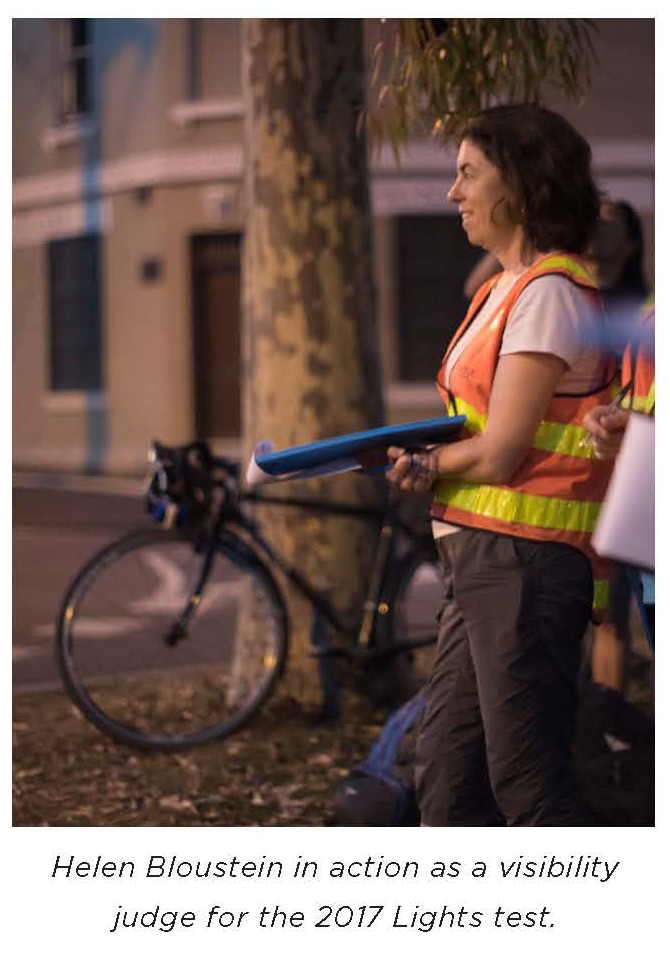
Helen Bloustein rides 20km a day commuting to work and on the weekends too, to get around. She volunteered an evening to be a judge on our panel to test bike lights this year.
“I learned a few things from the testing,” she says. “I was surprised how many lights are out there.”
Helen answered a call-out for Bicycle Network members to take part in the testing. As a regular Ride On reader, she is familiar with the annual test and uses the results as a guide for which lights to buy.
 “I’ve got some of the previous winners, from between two and five years back. It’s a great initiative that Ride On does this testing. It keeps people honest to some degree,” she says.
Helen gained some insight into what’s important in bike lights from the testing.
“I hadn’t really thought about the side-on angled visibility part of it before. That was also quite noticeable – that there could be a change from a light that was good front-on could end up being pretty average side-on.”
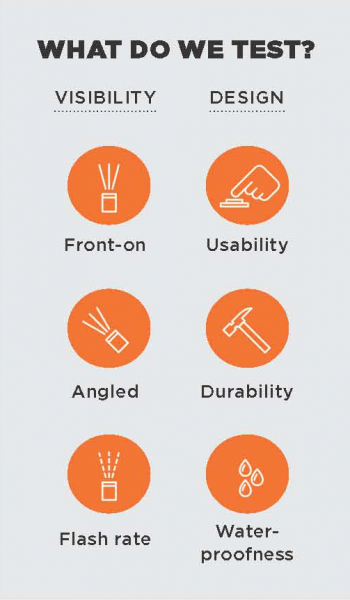
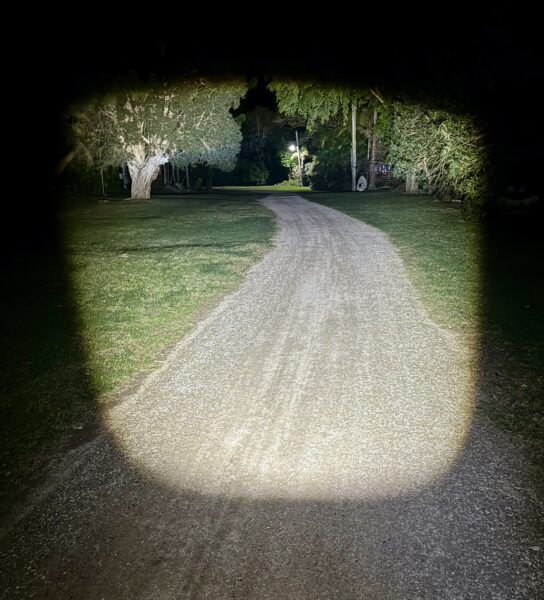
This is a key part of what we do – test in a realistic scenario to determine how lights perform when you need them to. While light output is scientifically measured in lumens, this is an expression of the total output of lights. Visibility is more complicated. It is affected by the focus, angle and flashing phase of a light, all within the context of a real-life situation. This is why we conduct an observational test of effective visibility rather than a comparison of lumens.
The visibility test is conducted after sunset on a real street in an urban environment. The judges (approximately 10 in the panel) stand first at 200m from the lights (which is the minimum visibility required by the road rules) and see the lights displayed straight at them. Then the lights are displayed at an angle of 45 degrees at 50m from the judges. This simulates visibility at an adequate distance for a car travelling at 50km/h to react and brake before hitting a bike rider. Each light is compared to a control light, which is the light which was the Best in Test for its category from the previous year’s test.
You can read about the testing method in more detail.
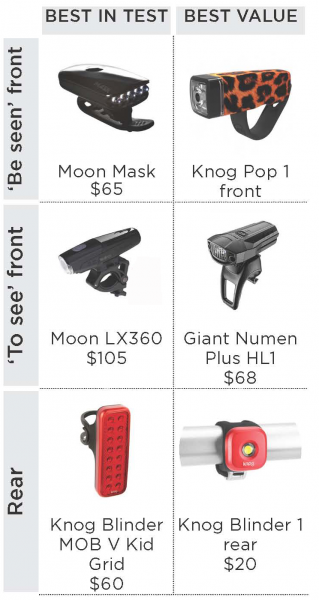
Riders need a red light on the rear of their bikes and a white light on the front. Rear lights are relatively homogenous in their output but front lights vary from basic to blindingly bright. While riders only need to be seen at 200m to comply with the road rules, some choose a light that can light up the way ahead, similar to car headlights. Indeed, some are similarly powerful as car headlights. To accommodate this variation of output of front lights, for this test we divide lights into lights to ‘be seen’ and those that are ‘to see’.
Helen’s need is for lights of the ‘be seen’ variety: “Mainly [I need lights] to be seen on the road, not so much for me to see where I’m going. I need others to see me,” she explains.
In fact, over-bright lights are a challenge to other riders on shared paths. Every winter Bicycle Network and Ride On get many letters about over-bright bike lights and calls for something to be done to prevent potential accidents.
Helen identifies this as an issue, saying she regularly sees lights that are “too bright if you’re a bike rider coming towards another bike rider on a path. Some of them are way too bright. You actually have to slow down because you’re not really sure where you are anymore – whether you’re going to ride off the side of the track or into them.”
 While state government, at least in Victoria, is aware of the issue, no regulation is currently proposed. We suggest that you write to your local state member and your state road authority if you wish to raise awareness of the issue. Please copy Bicycle Network into the correspondence.
Helen questions whether people are aware how much their lights are shining up and why they don’t shine them down instead. “They’re probably using it for their own visibility but forget that other riders might not like it.”
A simple solution is to carry a basic front ‘be seen’ light for commuting in built-up areas and a powerful ‘to see’ headlight for the unlit parts of your commute. When using powerful ‘to see’ lights on shared paths they should be pointed down when other riders are on-coming.
Be aware that some settings on newer bike lights are designed for day use. These are the most powerful modes the lights have, with the greatest output. These are so bright because they have to be seen in bright daylight. At night they are excessively bright and will blind other riders and road users.
“It’s a bit like having your high-beams on in the car – you normally remember to turn them down when you’re face-to-face with another driver,” Helen points out.
So does Helen need a light to see where she’s going? “Sometimes,” she says. “But not often enough that I’ve felt that I’ve needed a new set of lights or a second set of lights for that reason. I’d prefer the ease of one light that does the trick in most of the circumstances that I’m riding in.”
And is she confident that others on the road can see her? “From what I saw in the testing there were enough in the first category [compact ‘Be seen’ front lights] which seemed to do the trick to me. Generally I try to keep them well recharged.”
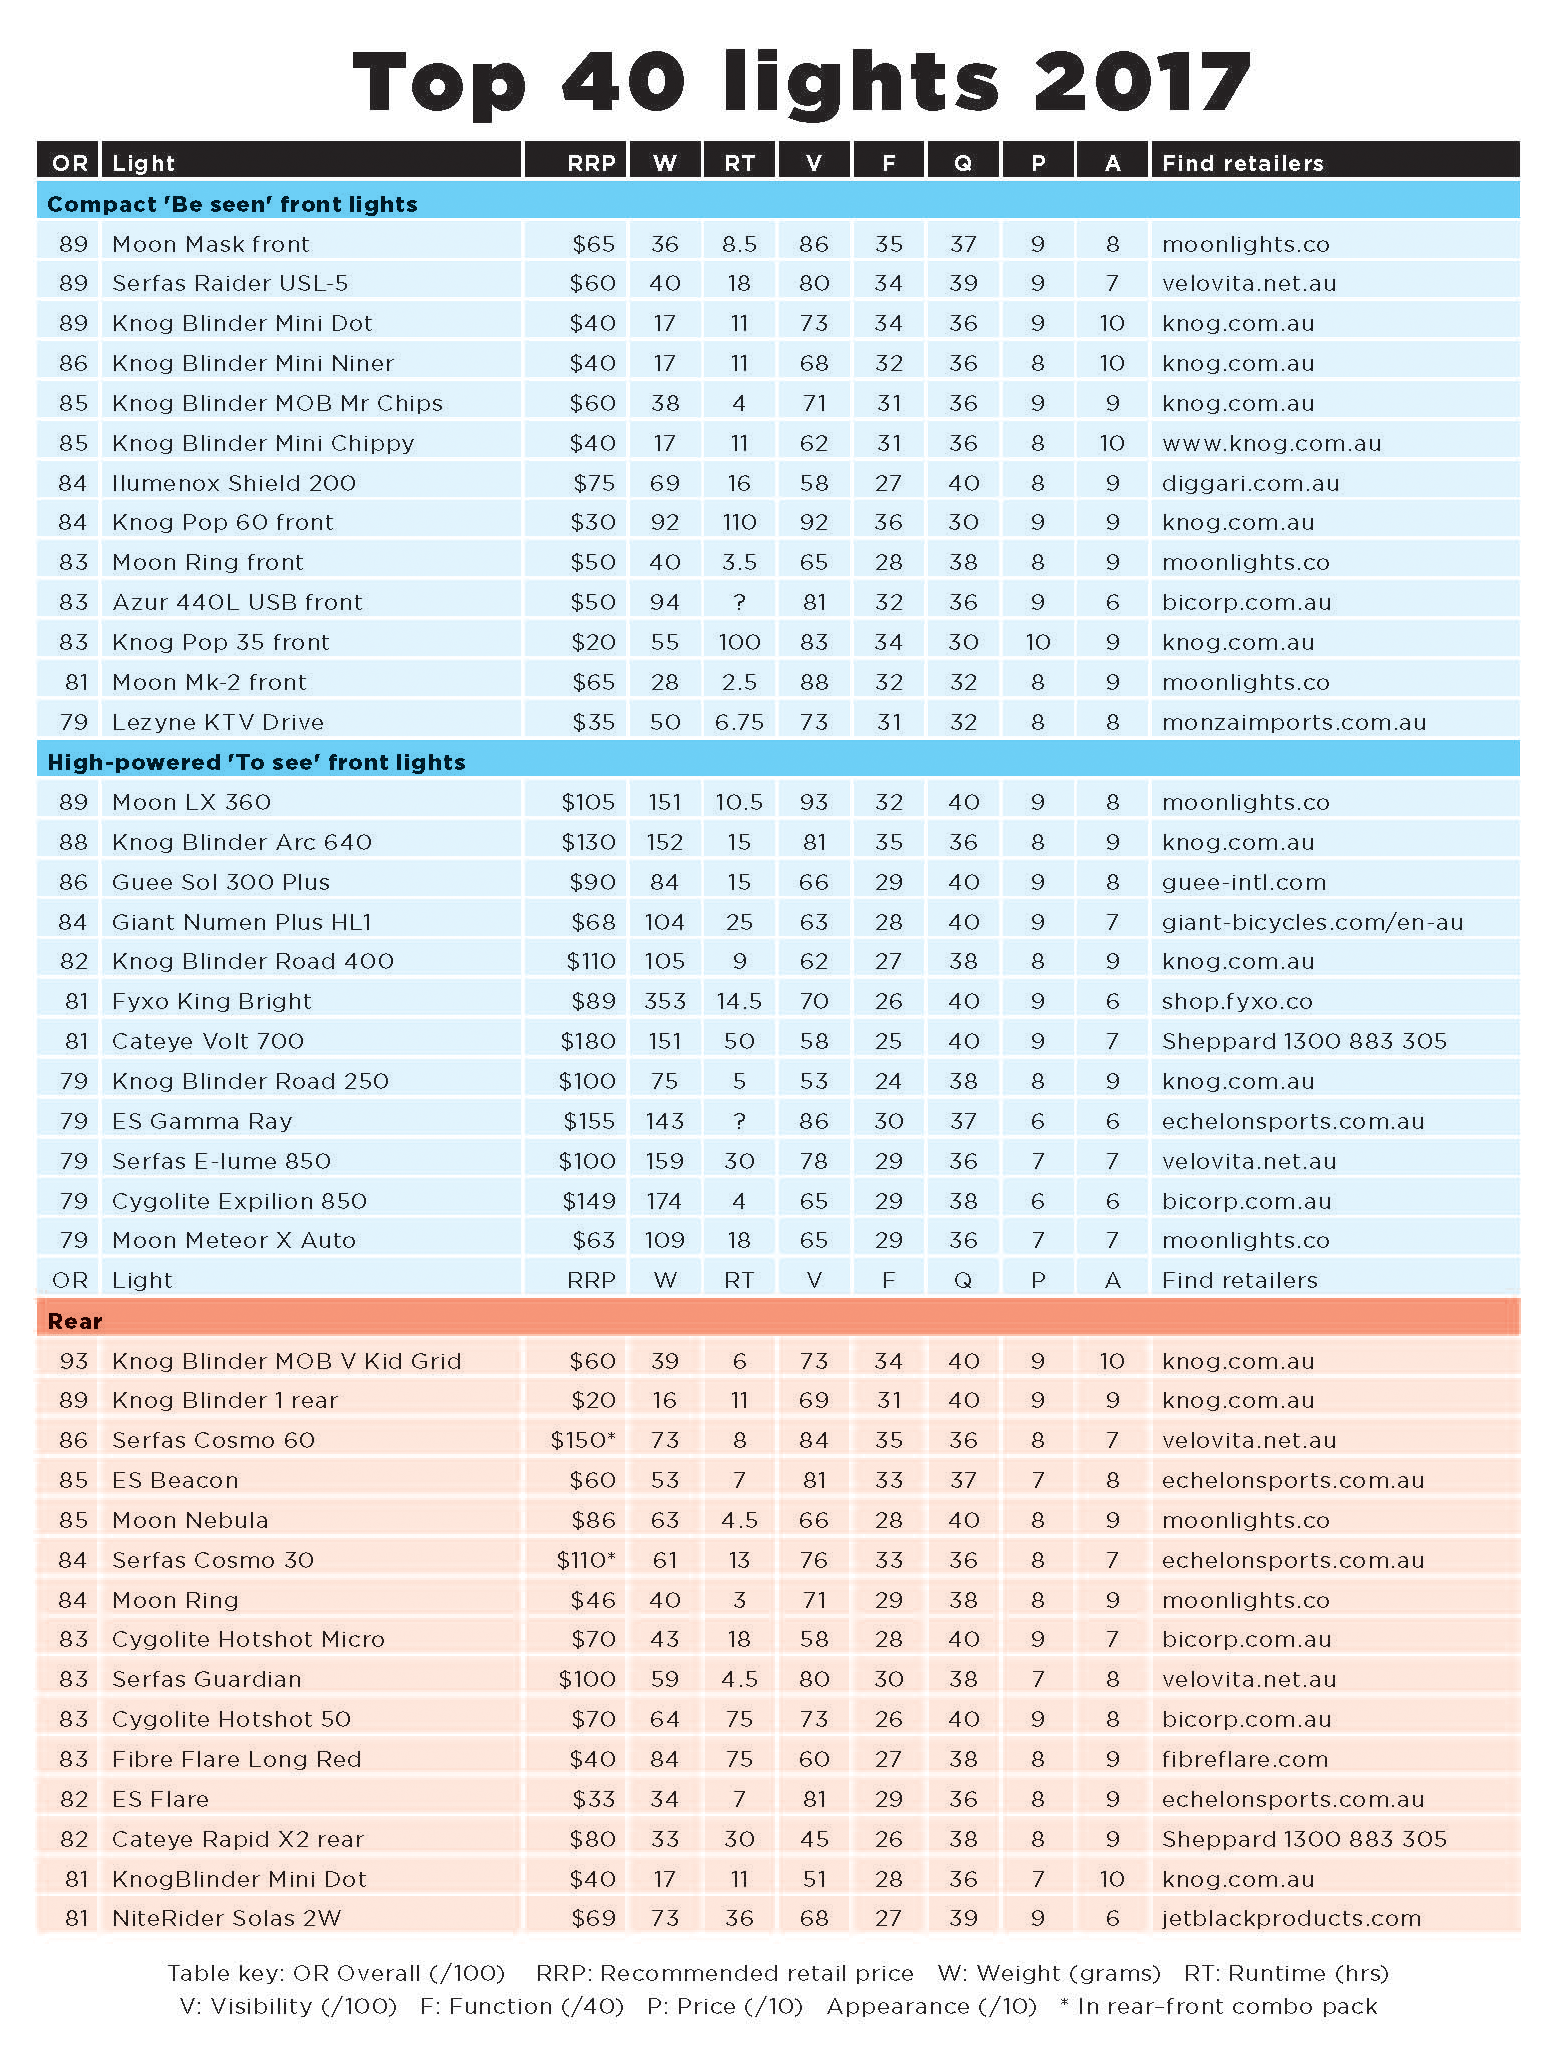
Most bike lights now have in-built rechargeable batteries (and you can use rechargeable AA and AAA batteries in lights that require them), so you have to keep on top of your recharging routine. Usually it’s as simple as putting them on to charge overnight every other day. A larger battery will provide a long runtime—or the period between charges—but with a larger battery comes a greater weight and greater cost. The time duration of your commute to work and home provides a minimum runtime of the lights you should get. See the table at the end of this article for a runtime listing for each light tested this year.
You can expect that a good light will have a low-power indicator, clearly telling you when you need to charge it up again. You might want to have a cable at work and a cable at home to charge at either location. Most lights take a mini or a micro USB input.
The ‘highlights’ of 2017
 In our 12th year of testing for the Ride On Lights test, we are possibly victim to our own success – there aren’t many dud bike lights to be found these days. That is of course if you’re buying your lights from a bike shop. Pretty much any lights you buy from a bike shop will satisfy the law and be effective at making you visible in low light.
‘Bike lights’ sold at non-bike-shops, however, are to be avoided. While we have found one or two that are acceptable, most of them are bike-light-shaped-objects only, that do a terrible job of making you visible. It provides a handy rule of thumb: if the lights aren’t sold in a bike shop they aren’t good enough.
We are committed to our annual testing, however. In addition to checking the effective visibility of new lights, we subject them to design testing with our long-time collaborator at RMIT Industrial Design, Senior Lecturer Dr Scott Mayson. His thorough assessment of usability, durability and waterproofness determines which lights are tough enough to warrant you spending your hard-earned cash on them.
See the Top 40 table at the end of this article for details of these lights and where to buy them. These are all lights that you can buy now. See previous Lights tests for older lights. The methods are the same, so the ratings still compare. It’s certainly the case that lights that are now discontinued are still good performers in comparison to current lights.
[panel color=”silver” size=”medium”]
Thanks to the testing crew for 2017
Scott Mayson, Senior Lecturer RMIT Industrial Design
Marcus Cher, RMIT Industrial Design graduate
Leesa Sherrin, VicRoads
Helen Bloustein, Bicycle Network member
Peter Foot, bicycle industry
Andrew Ma, bicycle industry
Richard Cross, Bicycle Network
Alexander Miller, Bicycle Network
Iain Treloar, Bicycle Network
[/panel]
Maximise your visibility
While a set of good lights is the minimum you need to make yourself adequately visible in low light, there are a few simple things you can do to maximise your visibility while riding.
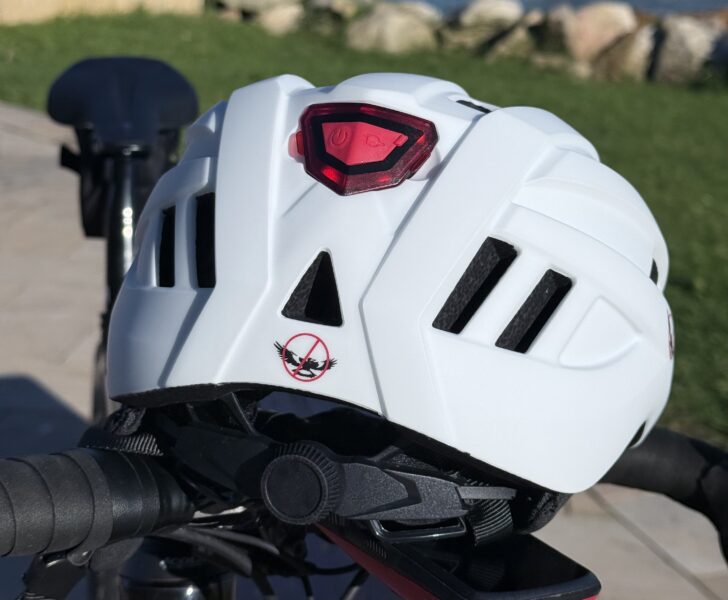
Studies have shown that a flashing light is the most visible, which is why we test all lights in flashing modes and recommend that you use a flashing mode when riding. Studies have also established that lights are the most visible to other road users when mounted at handlebar and seat post height. Lights should be fixed to the bike – those attached to clothing and bags frequently end up facing the wrong direction, and offer little benefit. Lights on helmets are less visible to drivers due to being higher up than the usual field of view, and can also be a menace to other bike riders because they are at eye height.
This ‘usual field of view’ of drivers is crucial for bike riders to consider. In the hectic traffic environment – without even considering in-car distractions – drivers frequently have a brief opportunity to scan the situation. If your lights are not in the space that a driver is scanning, looking for other vehicles, you’re putting yourself in danger of not being seen.
For extra visibility, don’t bother with a fluoro vest. Fluorescent colours need ultraviolet radiation from sunlight to glow. It’s reflective elements that are the go-to highlights for nighttime and low-light. Road safety testing has shown that reflective strips around the ankles are the most effective tool you can use to show other road users you are there. This is for two reasons: firstly they are within the usual field of view of drivers and secondly, they indicate movement that drivers quickly understand as being a bike rider.
For more see our article How visible are you?
 Ride On content is editorially independent, but is supported financially by members of Bicycle Network. If you enjoy our articles and want to support the future publication of high-quality content, please consider helping out by becoming a member.


Have you seen how much all this Hi-viz stuff costs? I ride to work every day and always use hi-viz outer clothing. But if you want to use the most effective clothing & lights you are required to pay extortionate rates. I think that one thing the various bike-riding organisations could do would be to look at making ways for this safety equipment & clothing to be made more affordable.
If anyone is looking for a cheaper light which will outperform the above High performance models in brightness, lookup “solarstorm light” in ebay.
The 2-light version is bright enough for road in day or night and can be had for less than $20 including shipping.
The 3-light version is better for off-road mountain biking or if you ride in pitch black and want a bigger & brighter light I guess.
You can get USB charging models, different battery capacities and models with Aus. chargers shipped from Aus or China.
The lumens claims are a bit exaggerated but they are very bright and have a wide spread of even bright light. They are sold by independent eBay sellers so no manufacturer backing but for the price, you can’t go wrong.
I have been using mine for about 2 years with no issues. I made the cabling a tight and the wiring got pulled from light but a bit of soldering and it is good as new.
The battery retain the charge for a long time if you don’t use it.
I have read so many articles concerning the blogger lovers except this paragraph is truly a pleasant piece
of writing, keep it up.