Euan Pennington jets off to Arizona to discover his inner framebuilder.
These days the bulk of bikes come from Asia. Large companies have done to bikes what Henry Ford did for cars, and production is all about big tooling, bulk materials and cohorts of skilled welders churning out dozens or hundreds of frames a day at astonishingly cheap prices. This gives us, the consumer, access to cheap and plentiful bicycle goodness. So why would anyone want a hand built frame, made by a human in a shed, with a dicky knee and wooden bladder, hands of ham and a wonky eye?
In short, if you are a racer focussed on having the lightest latest machine, or a commuter looking for a cheap urban transport solution, then you probably would not. You would think that hand built bikes are heavier, less precise and more expensive as an option, no matter how untrue some of these assumptions are. If, however, you are a cycle tragic, someone who dreams bikes and loves not just the practicality but also the romance and mystique, then a custom-built bike is the holy grail; one where you get to choose style, geometry, colour and parts to create the perfect personalised velocipede of desire. Should you wish to go down this route there are obviously two options. One is to find a custom frame builder to do the job for you. The other is to do it yourself.
Having endless projects in mind, the aforementioned ham fisted wonky eyes, and fifteen years of practice crisis finally maturing into a midlife crisis, I decided I wanted to learn the gentle art of frame building, so I began seeking metal masters to teach me. This eventually saw me in Arizona, enrolled in the Bohemian Bicycles frame building course. Dave Bohm has been building steel bikes since 1993 and has recently branched out into carbon as well, so knows a thing or two about knocking a treadly together. His courses are 11 days and cover all aspects of the frame construction. Painting and bike assembly are not covered—it would be just too much to get through! Each course has a maximum of two students, so close access to the instructor is assured.
Dave offers instruction in any form of “conventional” bike that takes your fancy, so you can choose a bike to build that suits your needs or dreams. He does not offer tandems, recumbents, fat bikes, tall bikes or penny farthings as these all require a greater level of skill, and one needs the basics first. Walking before you run is apparently important, but crushed my dreams of a ripping custom fat bike. I was soon to learn why …
The course begins with the theory of design, metallurgy, bike fit and construction, as well as discussion on what as a student you would like to build, how feasible it might be, and how it would be constructed. Your bike is then drawn up on a computer with a program that you can take away for future use. Throughout the course specialist tooling is available, but the emphasis is on doing things with a minimum of expensive toys. This allows the hobbyist to go home and have the skills to build more frames without needing a full machine tool array in their garage, although access to power tools is a joy, and allows you to make an error so much more quickly …
I decided to build a robust touring steed—29″ wheels, flat bars, strong rims and Rohloff ready. From this we extrapolated the style of dropouts needed, the geometry required for the kind of handling I pictured, sizing, tube spec, space needed for tyre clearance, bottom bracket height, rake and trail for the fork, standover height, type of braking system. Every aspect of the frame is discussed, planned and understood so that the student knows how and why design decisions are made. A dozen tubes nailed together to make a bike might seem like a very simple thing, but as my old geography teacher used to say, “it seems simple because you know nothing about it.” Well, now I was learning.
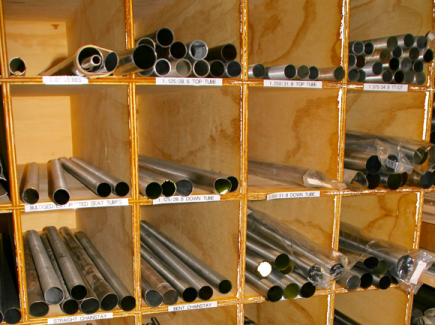
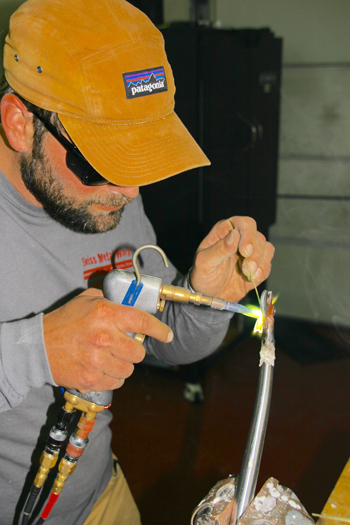 After the theory it was time to head to the shed and select some tubes, and a fork crown. Once this was done, we fired up the torches to learn some new skills. Dave is a big proponent of braising bikes, which essentially means heating joins and adding a filler metal to attach them together, usually silver or bronze. This makes for very smooth joins, rather than the “stack of coins” style of join which most people recognise as a weld. Braising does not heat the tube quite as much, preserving its heat treatment, and for me I also found it easier to learn than I did TIG welding, thus giving the beginner a better chance of success. Once we were competent(ish) there was no more dodging, and we were into building the bike’s fork. Starting with the fork lets the student put their new found skills into practice, and is less committing than beginning on the frame.
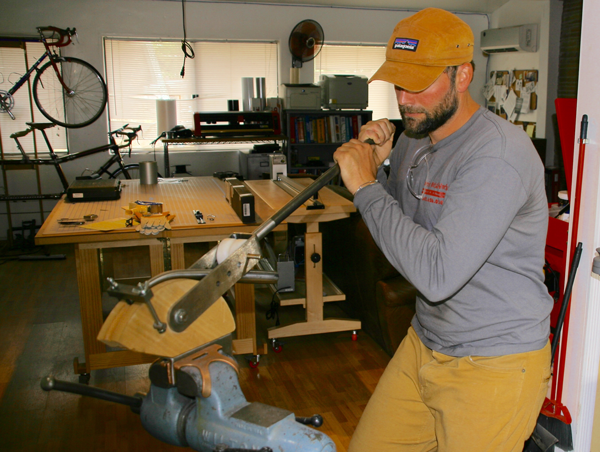
With the fork complete there was absolutely no more hiding, and we started mitring tubing for the seat tube, and braising dropouts to chain stays. Was my hand shaking from nervousness or coffee? Hard to say, but this very much had the feel of being at the sharp end now. The unruly stack of tubes on the bench gradually became sub-assemblies; seat tube and bottom bracket, head tube and top tube, chain stays and dropouts. These were then secured to the frame jig for tacking together. After tacking, they were checked for alignment before being finally braised, then checked again.
It soon became apparent that the actual attachment of the tubes and the firing of the torches was just a glorious sideline in the true business of frame building, which actually consists of sanding, filing, aligning, rechecking and then resorting to more filing. Preparation and finishing take the bulk of the time, to the point where at times it seemed like it would have been easier just to start with a block of steel and begin carving. It’s crucial work, though, for a single marginal joint can pull a frame out of alignment, or fail at an inopportune moment. Worse, a mistake at the start might cost you a day, but a mistake toward the end can ruin the whole frame, so every join felt like quite the commitment.
Days passed, however, and eventually steel was transformed into a recognisable bike frame. The last day was spent on brake mounts, mounting braise-ons, reaming head and seat tubes and final tidy up until there was actually no more to do; I had built a bike. I still don’t know if it has sunk in—it’s too surreal to be true. I built a bike.
If you are at all interested in bikes, a frame building course is an amazing experience. So much goes into it that for eleven days my head was almost exploding with new information and skills, and even then it was just showing me that there was so much more to learn. It is simultaneously inspiring and intimidating, but fascinating as well. Like any educational experience it can be a window into another new world, or the springboard to explore that new world, but either way you end up cruising the streets on your new bike that is your new bike. You built it. “Hey, nice bike mate, what brand is that?” “Oh, it’s one I made myself …”
Does the satisfaction and street cred get any better than that?
Photography Euan Pennington
Ride On content is editorially independent, but is supported financially by members of Bicycle Network. If you enjoy our articles and want to support the future publication of high-quality content, please consider helping out by becoming a member.