Mastering the links
Iain Treloar runs you through the process of breaking, sizing and fitting a bicycle chain.
Chains are beautiful in the simplicity of their function, but surprisingly complex in their construction. Each link consists of a matching pair of outer and inner plates, two rollers and two pins.
A standard derailleur chain will have approximately 57 links, made up of 114 wider outer plates, 114 narrower inner plates, 114 rollers and 114 pins; a total of 456 parts. That’s a lot going on, and perhaps it’s unsurprising, as a result, that the chain is often the first part of the bike to make noises of protest when poorly maintained. Of the many components that make up a bicycle, the drivetrain and chain are perhaps the neediest when it comes to regular maintenance.
Chains aren’t just chains; just as there are almost half a thousand moving parts, there are numerous different permutations of the whole. The chain on your bike is more than likely brand and speed-specific; it may have a joining link or be joined by a pin that’s different to all the others in the chain. In some cases it may require very particular tools to join or disconnect (á la 11speed Campagnolo). It could be direction-specific (á la 10speed Shimano); more likely, but not always, it is able to be mounted in any direction you please.
Assuming you’ve safely navigated these quirks, let’s assume your old chain is knackered and you need to fit a new one—perhaps it’s rusted solid (hopefully not); maybe it’s squeaking like a nest of mice; maybe it’s skipping under load; or maybe you have a bike that you’re building from scratch and you need to fit a chain for the first time with no prior reference point. Either way, here’s how to size chains.
Firstly, be very conscious of the inner and outer plates of the chain and which ones are which, as you’ll need to end up with the correct configuration at the ends of the chain when shortening it to fit. And shorten it you most likely will have to; new chains usually come too long for their purpose (116 links is most common) and need to be shortened to the correct length.
Before cutting the links, consider whether you’ll join it using a joining pin or a joining link.
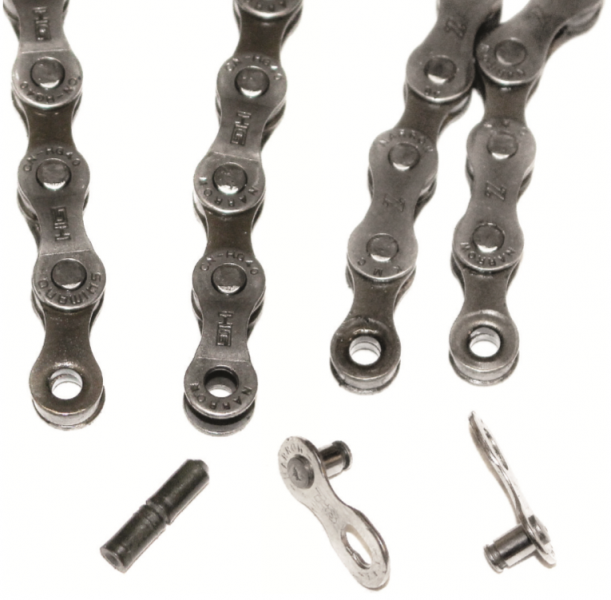
If you’re reattaching a chain using a joining pin, the remaining ends of the chain need to be one inner, one outer. If you’re reattaching a chain with a master link, you need two inner links. For ease of installation, cleaning and maintenance, we prefer the master link.
Chain length for single-speeds or internal hub gears
These types of bike usually have the ability to adjust the length of the chain through either an eccentric bottom bracket or at the dropouts. Eccentric bottom brackets, most common on bikes equipped with hub gears, pivot in the bottom bracket shell, allowing you to accommodate for chain stretch. Horizontal dropouts or track ends, more common on single-speeds or fixed gear bikes, allow you to move the position of the rear axle back and forth, again providing space to accommodate for chain stretch.
The system for sizing chains for single-speeds and hub-gear equipped bikes is straightforward. If you have an eccentric bottom bracket, adjust it to the point where the bottom bracket spindle is closest to the rear axle. If your chain tension is defined at the rear dropouts, adjust the chain tensioners or slide the wheel forward as far as possible. Put the new chain on the chain-ring and around the rear cog, and the tightest link that you can join whilst still allowing a tiny amount of chain-slop is ideal. This will give you the maximum scope of adjustment as the chain stretches, and as you’ve got a fixed chain-line, you don’t need to be as vigilant when it comes to replacing worn chains.
The other method, assuming you haven’t changed any gear ratios in the interim, is to use your old chain as a guide. Simply remove your old chain and line it up alongside your new one, and count the links along. Chains stretch out over time, so it’s important to do this link by link, as the old chain may appear to be longer despite having the same number of links.
Chain length for geared bikes
This is a little more complicated as you will need to factor in the way the derailleur interacts with the chain.
As well as changing your gears, derailleurs also act as a tensioner; without this, the chain would be too short in some gear combinations and too slack in others. But the rear derailleur’s ability to compensate for different chain lengths or gear ratios can also make it challenging to work out the correct chain length when it comes time to replace it.
It’s all pretty straightforward if your gear ratios haven’t changed; remove the old chain, carefully measure it up against the new one, and all will be well.
But if you’re fitting a chain up for the first time or building a bike from scratch, there’s a bit more to consider. The basics of chain sizing are fairly obvious. An overlong chain might rattle against the chain-stays and be more likely to derail, but a chain that is too short will potentially cause the rear derailleur to break at the hanger, career off into your spokes or frame and bring your ride to an expensive or even painful end. For this reason, as a general rule, it’s better for a chain to be slightly too long than too short. New advances in gearing technology make it easier to have a poor selection of gear (eg big chain-ring, biggest cog at the back). While cross-chaining should be avoided as much as possible, in the heat of the moment it can be easy to slip up, and with group-sets getting better at accommodating such gear combinations (for example, SRAM’s pivoting ‘Yaw’ front derailleur), there’s not always an auditory cue to remind you that things are going awry.
Experienced mechanics can eyeball the angle of a rear derailleur’s cage in extreme combinations and get a pretty clear idea of whether there will be any issues. The visual indication of a too-short chain is if it doesn’t form a noticeable S-shape as it passes through the rear derailleur’s jockey wheels in the largest combination, but rather passes through almost straight with the rear derailleur flexing sharply up towards the chain-stay.
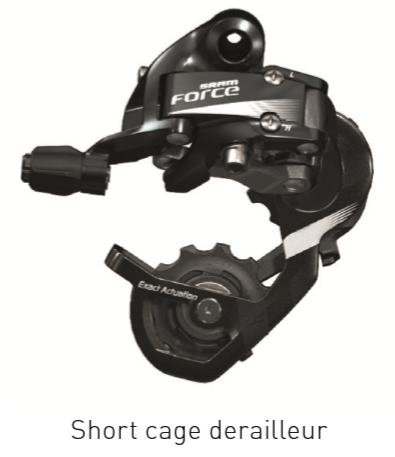
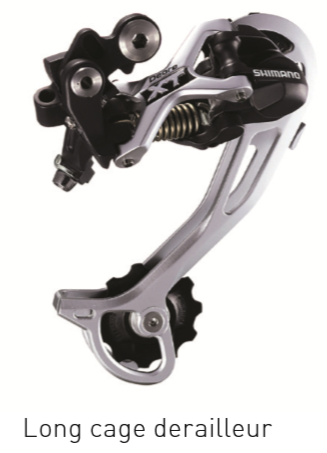
This is complicated by the fact that rear derailleurs are only built to support certain gear combinations—a maximum difference in number of teeth between the smallest and large cog on the back—which explains why there are different length rear derailleur cages available. A quick glance at a short-cage road rear derailleur, designed for a cassette narrower in range, and a mountain bike rear derailleur, designed for a wider gear range, will show you what I’m talking about—see below.
Every rear derailleur has a designated total capacity. This is calculated by adding the difference between the big chain-ring and the small chain-ring (eg 16 teeth on a 50/34 crankset), and the difference between a small cog (eg 21 teeth on an 1132 cassette), totalling 37. In this scenario on a road bike, a mid-cage rear derailleur will be required, as the rear derailleur won’t function in every gear combination without it.
Once you’ve ascertained whether your gear ratios are compatible with the rest of your drivetrain, there are two easy methods when working out the ideal chain length for your bike:
(1) Existing length: use your old chain as a guide. This works under the assumption that your original chain was sized correctly, that you haven’t changed the gear ratios and that you count the links out correctly.
(2) Big ring/big cog + 2: This is the most effective way to work out the chain length for a new gear combination or if you don’t have an old chain as a reference point. Thread the chain around the biggest chain-ring and around the biggest (innermost/easiest) cog on the cassette, but don’t thread it through your rear derailleur. Rather, just find the closest link that the chain will connect, count out two extra links, and this is the point where you should cut the chain. This is a little counterintuitive, as the cage of the derailleur seems longer than two links of chain, but somehow it all works out in the end.
Note that if you use a master-link as opposed to a pin, you need to factor this into your calculations. It should be counted as one of the links in that two link total; install one half of the master link on an end of the chain so you’re including it in your total, and cut the other end to leave an inner-plate.
Fitting a new chain (what you’ll need):
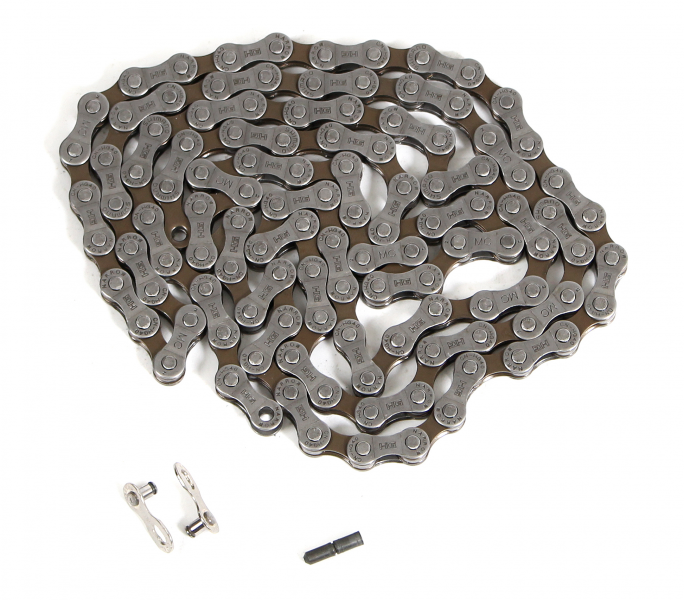
Chain: Correct width for your purpose, and correct ‘family’. There are two options for single speeds and hub gears (3/32” and 1⁄8”); 6–8 speed chains are the same width; 9, 10 and 11 speed chains are all slightly different widths and specific.
Joining link or joining pin: will usually come with the chain, although if you wish to run a joining link on a Shimano chain, for instance, you’ll need to purchase one separately as they are only supplied with a pin.
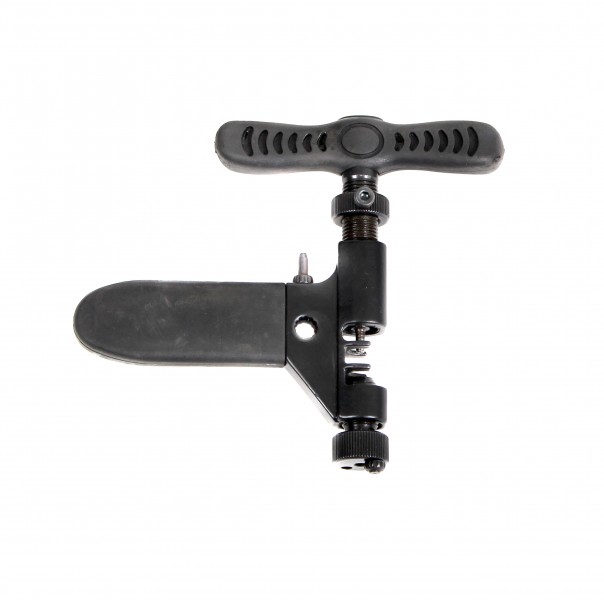
Chain tool: Generally these will work across the board, but there are some annoying exceptions to the rule. Campagnolo’s 11speed chains, for instance, require a brand-specific (and expensive) chain-tool.
Process:
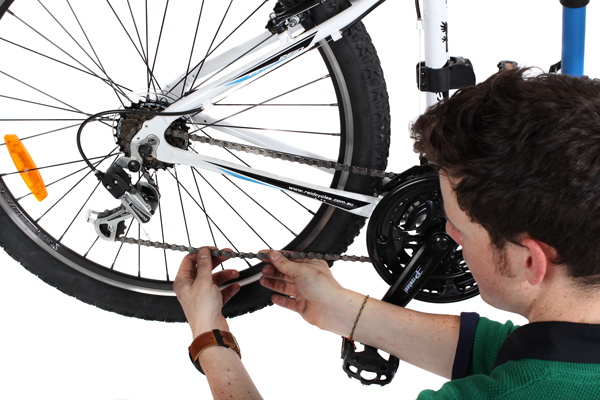
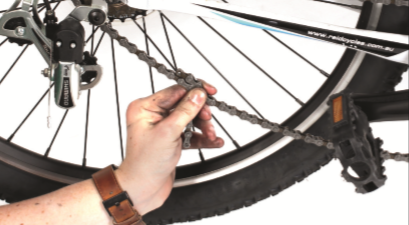
1. Identify the correct link to break (ensuring you leave two inner plate ends for fitting a master link, or one inner and one outer plate end if reconnecting the chain with a pin). Pictured is the big/big+2 method. Wrap the chain around the biggest cog and chain-ring, but not through the chain-ring (a).
The point where you will break the chain is two links more than the point where they meet (b).
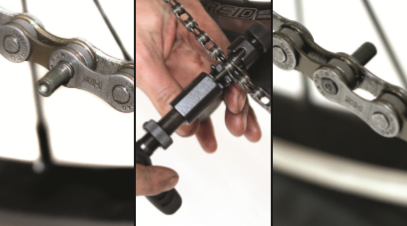
2. Place the chain into the chain tool with the link to be broken in line with the pin of the chain tool. Basic chain tools need to be held in place for alignment; more substantial models have a stabilising brace that can be wound in to hold the chain steady.
3. Wind the chain tool in towards the chain. There’ll be a degree of resistance as the flared end of the pin passes through the outer plates of the chain, then it will spin freely through, before another increase in resistance as the pin clears the other side of the chain. Wind a few turns more to ensure the chain is completely broken, then back it off to release the broken chain.
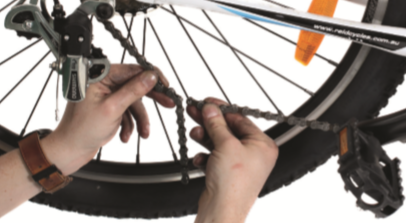
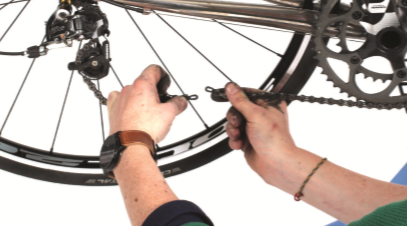
4. a) If you’re installing a joining link, you’ll need two inner-plate ends. The process here is pretty straightforward. Paying attention to any directional markings on the joining link, fit both halves below the chainstay and then pull the chain until they connect. They won’t click completely into place, but backpedal until the joining link sits above the chainstay and apply forward pressure to one of the pedals with your foot and you’ll hear it click shut.
b) If you’re fitting a joining pin, you’ll need an outer and inner plate end to the chain. The joining pin is longer (and fractionally thicker) than the gap it needs to fill, with a groove halfway along it. The first half of the pin is positional—it helps track the pin through straight. The sensations you’ll feel as you wind the pin through will be very much like those described in step 3. When you feel the second incidence of pressure lessen, the pin is correctly installed. Unwind and remove the chain tool. You’ll now have the first half of the pin sticking out the inside of the chain; the purpose of the groove is to allow you to snap the remainder off with a pair of pliers or similar.
5. Ensure that the newly joined link moves smoothly and that there is no greater friction through the link than any other links. If there is additional resistance, lubricate that link and work it back and forth with your hands until it moves fluently.
Ride On content is editorially independent, but is supported financially by members of Bicycle Network. If you enjoy our articles and want to support the future publication of high-quality content, please consider helping out by becoming a member.