

Plan a great escape
Want to take a break from your hectic life and discover a new sense of freedom? Bike-touring devotee Nicola Dunnicliff-Wells will soon have you packing your panniers.
 Whether you’re going for days, weeks or months, touring on a bike is a rewarding way to travel. Unencumbered by excess baggage, you live simply, carrying only what you need; unshielded by metal and glass, you feel the wind on your face and engage with the elements.
It’s a great way to connect with locals and fellow travellers; or the perfect means of getting away from it all. It can be a serious physical challenge, or pleasant (and calorie-burning) transport between wineries and eateries. The pace is ideal for soaking up sights, sounds and smells – and there’s no better way to explore a new city.
You sleep well. You eat well. You come home looking better than when you left. And you have the satisfaction of having achieved, rather than simply consumed. Sounds like the perfect holiday!
What kind of tour?
Like cycling in general, there are as many ways to tour as there are itchy-footed riders. At one end of the scale are organised tours, which typically include a fixed itinerary, accommodation, and transportation of your luggage. At the other is self-sufficient touring: carrying food, camping and cooking equipment, and riding where you choose.
Organised tours
My introduction to touring was the Great Victorian Bike Ride, which was an ideal way to start. Because your luggage is carried on an organised tour, you don’t need the equipment required for independent touring, nor quite the same level of fitness.
You pay for the tour organiser to make life easy for you. They plan the route and itinerary; there’s often a ‘sag wagon’ if you break down, injure yourself or find the going too tough; and there are usually showers, meals and accommodation (sometimes tents).
Some tour companies provide a guide who rides with you, while others provide maps of the route and carry your bags.
Credit card touring
If you fancy the freedom of independent touring but don’t want a bike laden with camping gear, try ‘credit-card’ touring. Riding between places to eat and sleep, you’ll need to carry little more than your wallet, a change of clothes, toiletries and a repair kit.
It’s ideal if you’re short on time, like comfort, don’t want to compromise speed or distance, or would rather sample local cuisine and attractions than set up camp and cook.
Credit card touring doesn’t have to mean gourmet food and five-star accommodation, however. You can tour on a budget, buying picnic supplies, and staying and cooking in backpacker hostels or caravan parks (though you may need slightly more gear).
Self-sufficient touring
Though it’s least expensive, self-sufficient touring isn’t only for those on a budget. Many cyclists relish carrying everything they need and getting off the tourist trail. From the feel of a fully-laden bike to open-air cooking, self-sufficient touring feels like an adventure.
Gear you’ll need
The gear you’ll need for a multi-day tour depends on how self-sufficient you plan to be. Always carry food and at least two water bidons – it’s so important to drink and eat regularly. Other essentials include: a pump, tyre levers, spare tube and repair kit; a map and cycle computer (many route guides rely on distance readings). It’s wise to include a weatherproof jacket, sun protection, phone and emergency lights. You may choose to carry a guidebook and/or GPS.
Carrying gear
On a multi-day tour, you’ll probably be carrying more than the basics. Don’t consider cycling with a heavy backpack; the weight, restricted movement and heat generation will soon become an intolerable burden. Racks and panniers are the conventional means of carrying gear; luggage trailers offer an alternative. Also useful are handlebar bags with a clear plastic compartment for maps.
Good panniers aren’t cheap but will last for years of touring (and commuting). Look for bags with stiff backs, a simple and secure attachment system and strong fabric. Unless they’re waterproof, line them with plastic bags.
For fully loaded touring, a strong rack is recommended. ‘Touring’ racks have a dogleg section at the back which keeps the pannier away from the spokes. Choose low-rider front racks unless you’re heading bush.
You can usually get away with rear panniers for credit card touring; otherwise you’ll probably need front panniers too – both for the capacity and better bike handling. Aim for 60–70% of weight over the rear wheel and 30–40% over the front. Pack heavy items first to keep the weight distribution and centre of gravity low.
For more detail of what to pack and how to carry it, have a read of Jon Miller’s ‘Bike touring basics’ article.
Tool kit
Unless you have mechanical backup or a sag wagon, carry a first aid kit and enough tools to get yourself out of trouble. Consider including: a puncture kit and glue, tyre levers, a pump, chain lube and a rag, Allen keys, an 8/10mm ring spanner, spare screws and bolts for pannier racks, flat and Phillips head screwdrivers, a spanner to fit wheel and seatpost bolts (if required), hand wipes and/or disposable gloves. You may also wish to include a chain breaker and spare chain links, spoke key, spare spokes and nipples, plus pull ties and gaffer tape.
For lighter touring you may be fine with the standard repair kit.
What to wear
In the saddle all day, you’ll be more comfortable in cycling clothes than ‘civvies’. Padded knicks or ‘shy shorts’ (traditional-looking shorts with a padded interior) help minimise saddle soreness and chafing. Though optional, cycling tops are breathable, don’t get clammy, don’t flap and contain back pockets for small items.
Cycling clothes dry quickly, so you can wash and wear a clean set each day. Layer knicks and top with leg and arm warmers or a separate pair of longs and long-sleeved top. A breathable rain and wind-proof jacket is essential, as may be a warm top/jacket. Also carry a set of off-bike clothes.
Cycling gloves help prevent numbness, sunburn and grazed hands in a fall. Other essentials include a helmet (preferably with visor), and sunglasses. With clip in pedals, you’ll need cycling shoes with recessed cleats; otherwise, choose a shoe with a hard, stiff sole for pedalling efficiency.
How much to carry
On day three of my first independent tour I posted home a big parcel of excess gear – and the hills became manageable. The lesson? Carry only what you really need and keep off-bike equipment to a minimum (leave out the hiking boots).
For hostels and caravan parks, you’ll usually need a sleeping bag, sheet and towel. For self-sufficient touring you’ll add camping and cooking equipment.
A suitable bike
While you don’t need a purpose-built touring bike, it’s worth considering the features of such a machine when weighing up whether yours will pass muster.
You need a bike that fits well (mandatory) and is geared appropriately, comfortable enough for days in the saddle and sturdy enough for the conditions you’re likely to encounter.
Hybrids, rigid and (to a lesser extent) hard-tail MTBs are good options. Soft-tail MTBs are not, and road bikes will only be suitable for catered-on road rides where you don’t have to carry anything but the basics. If you’re stuck, consider hiring an appropriate bike (plus racks and panniers).
Traditional touring bikes are workhorses, designed to hold up under load, while remaining comfortable after many hours in the saddle. Typically they have:
- Steel frames. Steelabsorbs more road shock than aluminium or carbon fibre and are easier to repair on the road, although Cannondale’s aluminium touring bikes are popular and well made.
- Relaxed frame geometry. Compared with a road bike, a touring bike is longer, with greater angles between the top tube and both seat and head tubes. It’s more comfortable for long rides and the steering is more stable, something you’ll appreciate under load.
- Drop (road-style) bars. Multiple hand positions help minimise muscle fatigue and numbness. Handlebars are usually set at saddle height, giving a slightly more upright position. This prevents soreness in the hands, shoulders and neck during a long ride – and you can enjoy the scenery! Fit bar ends to flat bars and raise your bars if necessary (this may require longer cables and possibly a new stem).
- Fittings for racks, mudguards and at least two bidon cages. It can be challenging to get these essentials onto non-touring bikes. Lack of fittings can be overcome with brackets; however, short chainstays, oversized tubing, suspension and carbon fibre can compromise or prevent rack fitting; while clearance between tyre and fork may be insufficient for mudguards. Take your bike to the shop when you buy!
- A good range of gears. Most touring bikes have a triple crankset (usually 48, 36 and 26 tooth or 50, 39 and 30 tooth) and a wide-range rear cassette (typically 11–32 tooth). Discuss gearing options with a bike shop (ideally a touring specialist); changing your rear cassette may give you extra gears for relatively little cost.
- Strong wheels. Touring wheels usually have widish rims and at least 36 spokes. Ask your bike shop about a sturdy 36-hole rim and, if you can, use an experienced wheel builder – you’ll pay a little more than for off-the-shelf wheels, but they’re more likely to stay true under load.
- Hard-wearing, wide road tyres. Continental and Schwalbe manufacture good touring tyres. Many incorporate puncture proofing (e.g. a Kevlar), which is worth paying for. Unless you anticipate unsealed roads, choose a slick or semi-slick 28–35mm (1– 1.75” for mountain bikes).
- Clip in pedals or toe clips. Theseimprove pedalling efficiency. Mountain bike shoes have recessed cleats so you can walk in them.
Planning a tour
In planning, consider what you want from your trip and your constraints: your time and budget, your fitness level, your cycling experience, and what gear you have (or can borrow).
Here’s Ride On’s bucket list to start you thinking. Otherwise there’s Lonely Planet’s Epic bike rides of the World and heaps of websites, blogs and material online. Talk to other riders. If you’d rather skip the research, many bike touring guide books provide details of routes that are tried and tested, and ranked in terms of difficulty; plus other information such as when to go and where to stay.
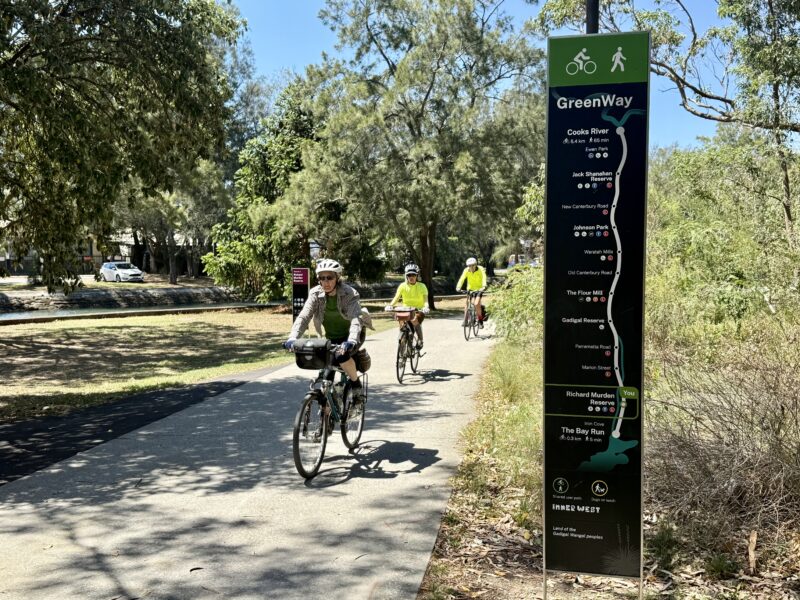
Rail trails are a good way to start, especially with children. Free of motorised traffic, they are relatively flat, scenic, can be reached by train and have plenty of bike-friendly accommodation and food nearby.
When you have decided where to go, research local weather (and wind) patterns; plus seasonal variations in prices, opening times, tourist numbers and traffic. Use travel guides, tourist information centres and, for Australian weather, www.bom.gov.au.
Shoulder seasons are often ideal: traffic is lighter, and prices lower, than in peak season, and the weather is sometimes better.
Route planning
I once planned a ride around Ireland’s famous Ring of Kerry. Initially it seemed that I would be riding alongside the multitude of tour buses and cars that circle daily. However, by incorporating a car-free section and an additional circuit that few tourists bother with, avoiding the second coastal section in favour of a quiet road between the mountains, and avoiding the busiest times on the remaining popular road, my tour incorporated the best sights with minimal traffic.
One of the joys of bike touring is getting away from predictable main roads and traffic – and finding the best route is part of the fun, if you enjoy poring over maps. Use large scale maps – those that show minor roads, which are often the gems. Be aware, though, that the gradients often vary more than those on highways.
Topographical maps give some idea of hills; or pick up clues from looking at Google Earth, or the relative straightness of the roads. Better still, check whether an elevation profile is available on a bike route website such as www.mapmyride.com.
These websites show routes that other cyclists have uploaded, along with cue sheets and elevation profiles (but minimal description). They can be particularly useful for finding routes into and out of big cities.
Talking with touring cyclists and reading blogs is helpful. Talking with non-cyclists can be less so: often unfamiliar with minor roads, they may also be hesitant about directing you down a ‘remote and lonely’ path.
A GPS (handheld or incorporated into your phone or cycle computer) can be useful to plan routes, plot progress (and see where you are), but a paper map is still worth carrying: they work when there’s no reception and never need batteries.
What’s realistic?
Unless you’re used to riding long distances on a loaded bike, be conservative: 90km days early on are tough, especially if you have to set up camp. Having said that, 50 or 60km days can pass quickly (unless they include mountain passes, headwinds, or gravel roads) and you might arrive before lunch.
Your average speed will be lower on a loaded bike. Even if you average 20–25km/h on a training ride, a realistic touring average might be closer to 15–18km/h. Depending on your fitness and the terrain, it could be as low as 12km/h (excluding breaks).
Start gently on your first tour, perhaps building up to longer days as you gain fitness. Factor in time for rest stops; and include rest days – one every four or five days, depending on your fitness and the terrain.
If possible build in flexibility, such as the option of modifying the route, time for additional rest (or bad weather) days, or access to public transport. There is no shame in moving to plan B should things not go as anticipated.
If you are flying or taking public transport, investigate the rules for carrying bikes on that particular service. Trains usually transport bikes, but often subject to space availability; buses are a riskier bet. Many airlines and rail companies require your bike to be partially dismantled and boxed.
Preparing yourself
You’ll enjoy touring more with at least a moderate level of fitness and some ‘miles in your legs’. Start to prepare a few months in advance, if you can. The training period is also ideal for refining your bike setup to improve fit and comfort.
If you’re not already riding regularly, try for at least three rides a week. Build up the number of hours and get in some longer (e.g. 70km) rides before you go. Ramp up the intensity with some hills, but don’t skimp on recovery: include rest days, plenty of sleep and a nutritious diet.
Nicola Dunnicliff-Wells caught the touring bug 20 years ago and has, among other things, co-authored four Lonely Planet cycle touring guidebooks. She’s looking forward to plenty more touring with her young children.
Ride On content is editorially independent, but is supported financially by members of Bicycle Network. If you enjoy our articles and want to support the future publication of high-quality content, please consider helping out by becoming a member.


hello my names stuart , I need advice ive just got a cycle cross bike so i can tour and train on . its a great bike but my dilema is do i by a bob trailer single wheel pannier trailer or racks on bike.Can you give me some advice please
Hi Stuart
Cyclocross bikes are wonderfully versatile machines but one of their drawbacks for touring is that they don’t usually have long enough chainstays to prevent your heel striking the pannier. This means when your heel is furthest back in the pedalling cycle it comes in contact with the pannier on the rack. This is really annoying when you’re riding all day and you end up with an injury from twisting your foot out of the way with every pedal stroke.
However, if you have smallish feet and the bike has longish chainstays (430mm) and if you can position the pannier far back on the rack, you’d be alright with a rack and panniers. Ask your favourite bike shop for advice.
Personally I can’t imagine life without a rack and panniers but I’m also a fan of trailers: I find they track well and don’t compromise manoeuvrability or performance – you hardly know they’re there. I do find a kickstand handy with a trailer so the bike stands securely while you access the trailer.
Another option is a Xtracycle Free Radical module, though these are unfortunately not distributed to Aust bike shops at the moment.
Enjoy your touring
Simon Vincett
Hi
A friend and I ate planning on doing a self
Supported from Sydney to Gold Coast
Are there any National Magazines out there
that we can advertise for other riders
to come with us
Ive advertised with Adventure Cyclist in
America under Companions Wanted
Is there an equivalent here??
Regards
Tony Penz