

Get a grip
Having the right grip on your handlebars can add much joy to your riding experience, finds Rowan Lamont.
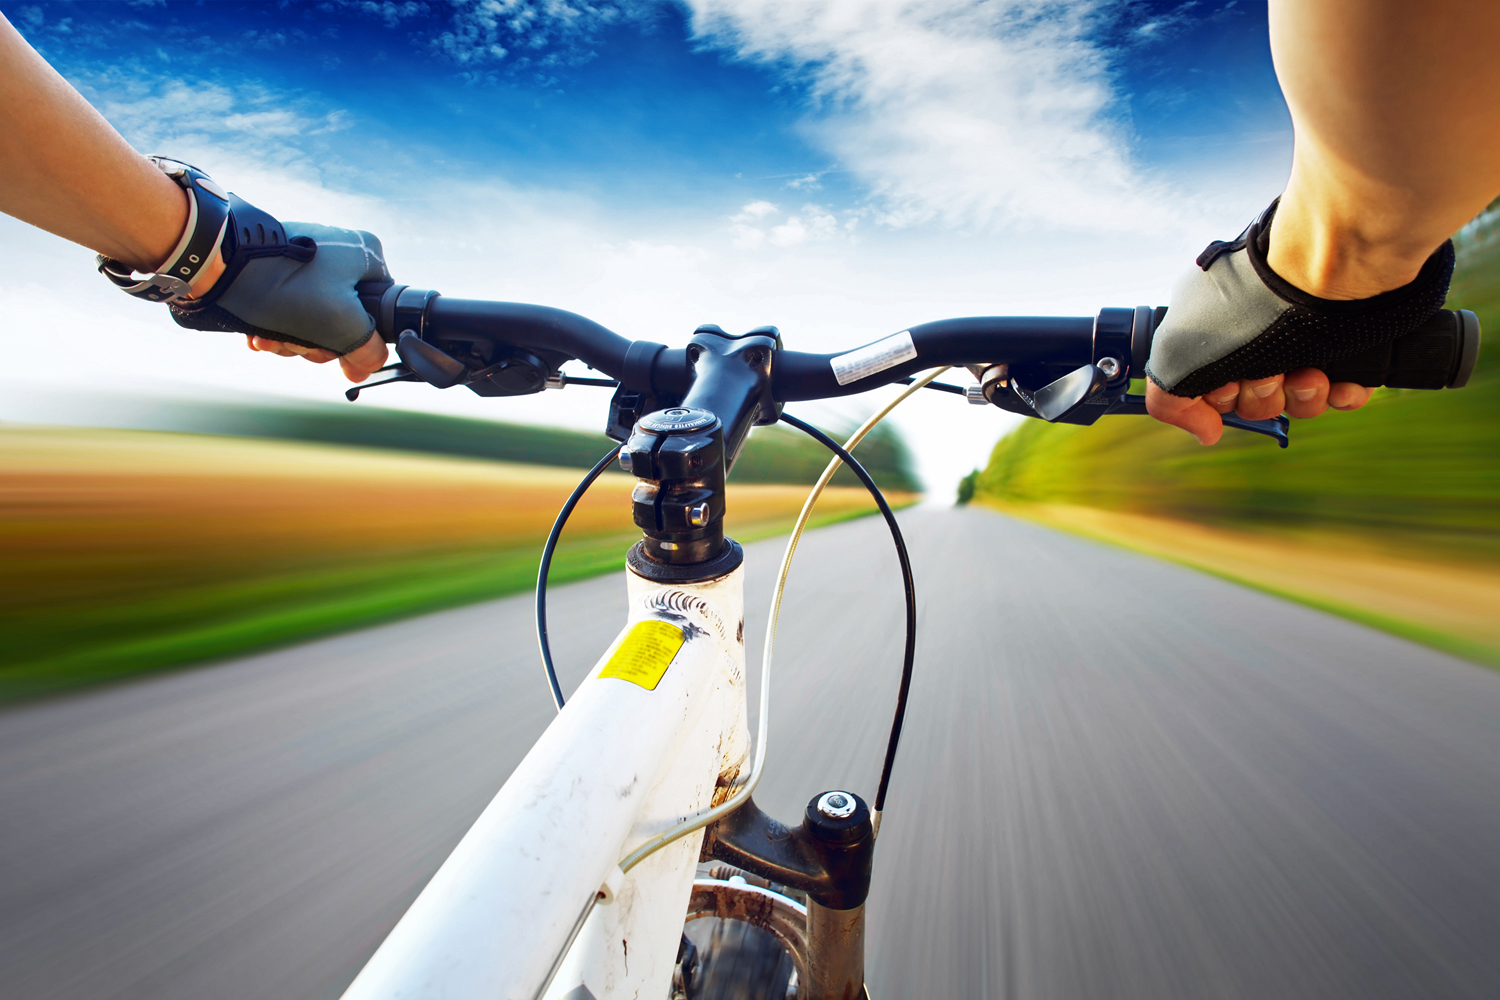
There are three points of contact between a rider and their bike: feet, bottom, and hands. Unsurprisingly, people’s bottoms attract the most attention, followed by feet, and hands are often the last contact point a rider thinks about. Grips are often underrated but can make a huge difference to the comfort of the rider, and the right grip can give a big boost to the riding experience.
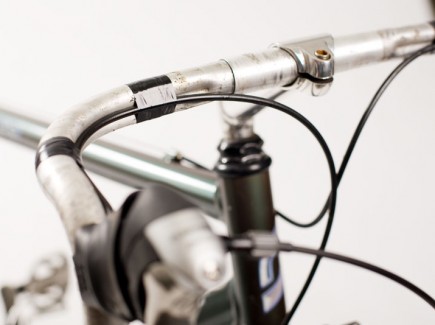
Handlebar grips fall into two main camps: tapes that are wrapped around drop handlebars, and slide-on grips for bicycles with straight bars. The type of riding you like to do will have some bearing on the type of tape or grip to look for.
Tape
Urethane foam tape is the most common tape used; it is slightly squidgy, relatively cheap and quite thick. When wrapped onto a bar it stacks up to fill the hand and is great for riders who enjoy a comfortable ride. The foam absorbs much of the road buzz and helps reduce sore and numb hands over longer distances.
Some long-distance touring riders like to double the comfort with two layers of tape; they can be cross-directionally wrapped, which is tricky to do, but if using contrasting colours it can look spectacular!
Urethane is not for everyone as the wide hold reduces steering sensitivity and can be too much of a handful for those that like a more direct control and feel. It does tend to hold sweat and become a bit smelly over time.
Leather tape is a great way to avoid a stinky bike and it will build up a patina over time, giving a very classic look. It lasts for ages, is tough and difficult to damage, and the look will be very appealing to some, but it can also be expensive.
Micro-fibre tape is another good alternative as it is thinner, does not absorb rain or sweat and dries much quicker. It is great for people with smaller hands or those who like a direct feel. Whilst being slightly expensive it tends to wear well, and won’t scuff or tear as easily as urethane.
Cork-backed tape combines the longevity of micro-fibre tape with a layer of cork that adds comfort and shock absorption.
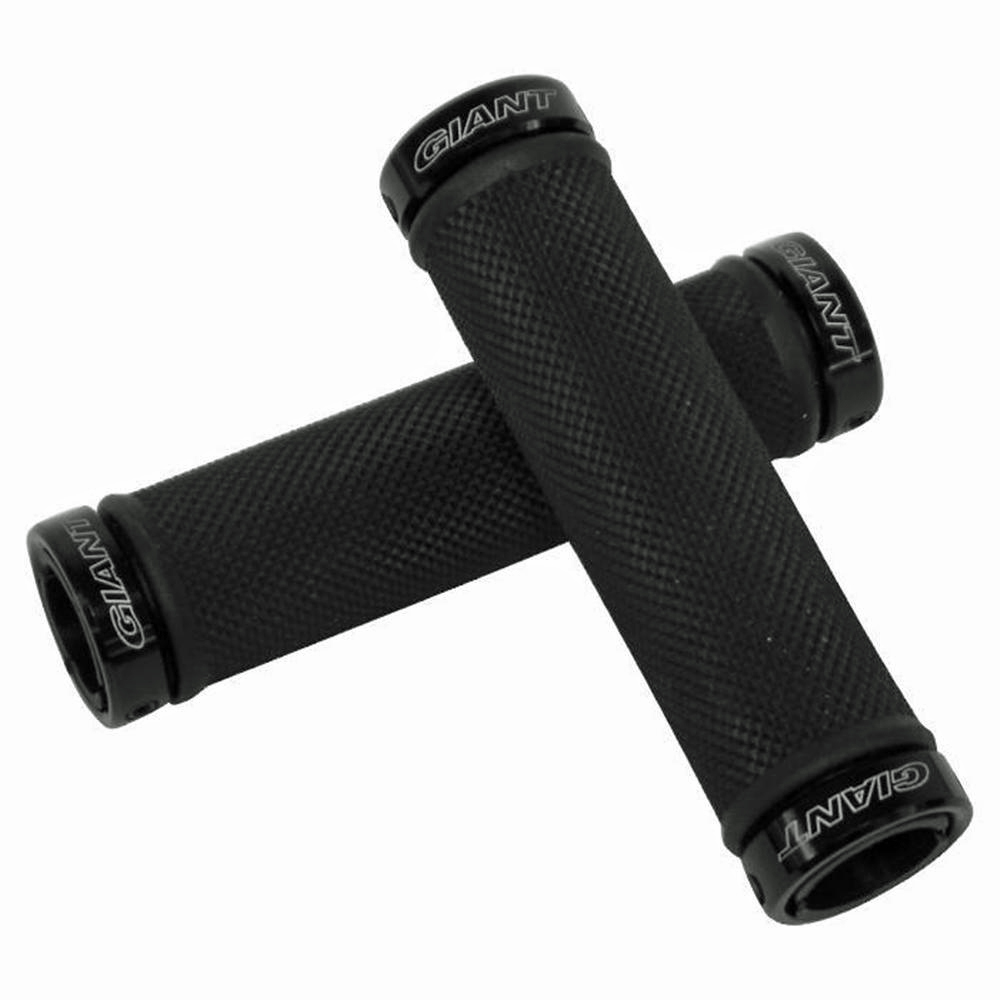
Rubber grips
Rubber grips are generally used on straight handlebars. Fitting them can be troublesome and wrestling them into place is often a real struggle.
The simplest way to fit a rubber grip is to use an air compressor. Slide the air nozzle into the small hole on the closed end of the grip, cover the opposite end of the handlebars with your spare hand and turn on the air. The pressure will expand the grip, allowing it to easily slide along the bar into position. Turn the air off and it will shrink down onto the bar to have a firm hold. But as not everyone has a compressor on hand, an alternative is to use a light coating of hairspray applied to the bar and quickly slide the grip across the lubricated surface before the hair spray becomes sticky.
This type of slide-on grip can be treacherous in the rain, as water works its way in between the bar and grip. On a particularly wet mountain bike ride, a rider in our group had his grips shoot off the end of the bars with no warning! I know of riders who use thin wire tightened around the ends of the grip to prevent water creeping in.
As a result, lock-on grips have become popular, particularly with mountain bike riders, who also tend to twist rubber grips around the bar as they negotiate rough terrain. The soft rubber grip fits over a hard plastic sleeve which slides over the bar, and is held in place by tightening a ring collar. Once on, the grip cannot move. They are very simple to install, and as they wear the sleeve can be rotated to even out grip wear.
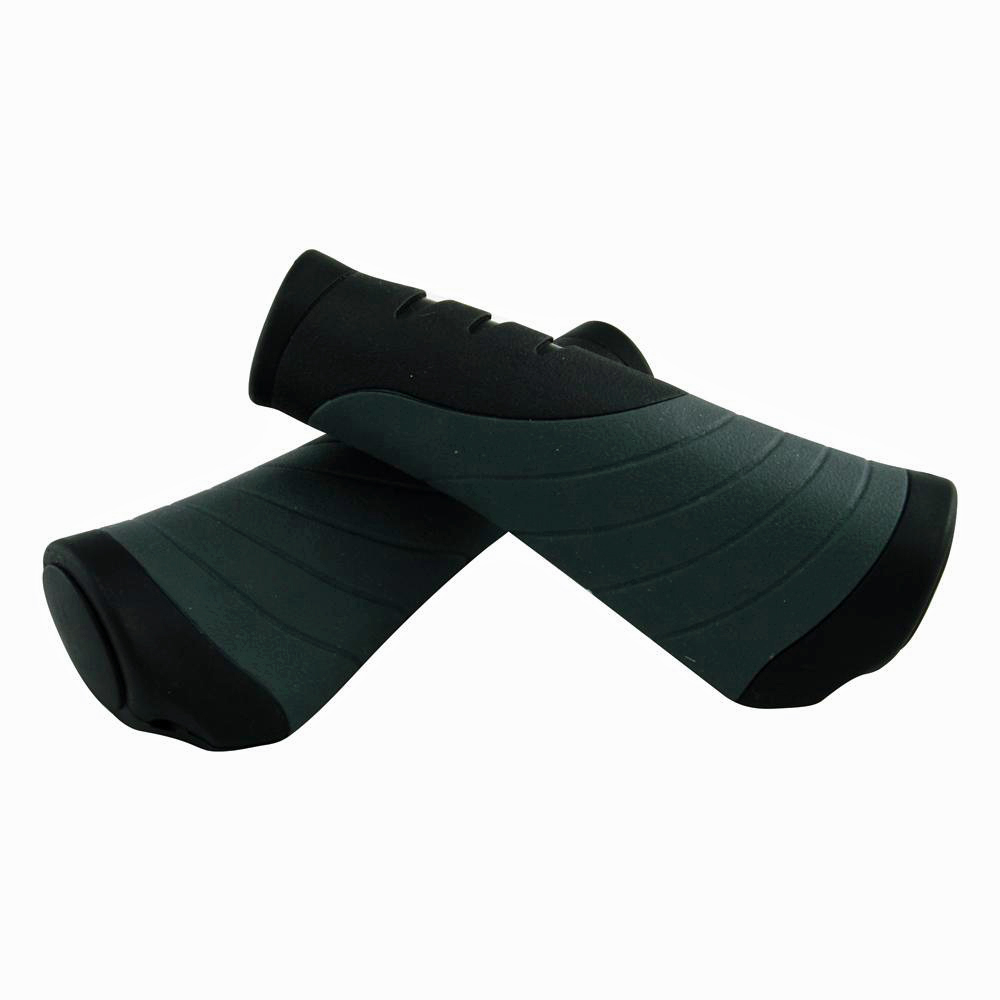
The choice of grips for flat-bar riders is vast, with different rubber patterns providing levels of padding and comfort. Chunky Oury grips are a favourite for rough mountain bike riding, with their large solid rubber blocks.
Odi grips have a waffle pattern and a smaller diameter suited for smaller hands or riders that like more steering sensitivity. Riders that have narrower hands may consider cutting down their grips, allowing them to reach the controls without an extra inch or two of bar sticking out the side ready to catch passing objects.
Solid cork grips wear into the shape of your own hand, and leather-bound cork grips add another level of comfort, class and chic.
Ergo grips have become popular with enduro mountain bikers and some flat-bar city bikes. They support the heel of the hand and help to spread the load across a wider area while reducing wrist fatigue.
Hold on
Modern brakes will often only require your index finger to activate, although two or more may be needed, but be careful that you don’t lose your hold on your bars. Always keep your thumb under the bar so that when you hit a bump your hand won’t be jolted off.
How to tape your handlebars
There is a little bit or preparation required when you come to wrap a new set of tape onto your bars.
Strip your old tape off and carefully remove any glue or gunk with paint thinner or WD40, then clean the bar with detergent, rinse thoroughly and dry.
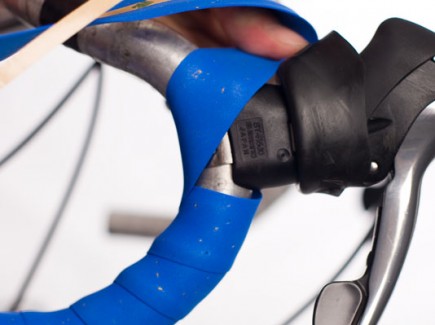
Keep the brake and gear cables in place by using electrical tape so they do not get in the way when you are wrapping and are not going to be uncomfortable while riding (1).
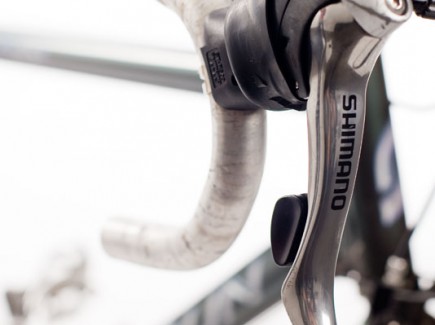
Roll the hoods of your brake levers back so that they can be placed on top of the tape when you are finished (2).
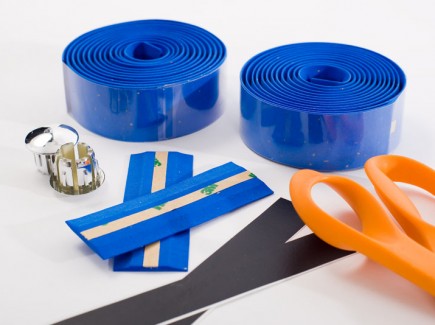
Your new bar tape will often come with a the standard two rolls of tape, plus bar ends, some finishing tape, and a couple of short strips of tape (3). Some people use these short strips over the back of the brake clamp and use some electrical tape to hold them in place, but if you wrap the tape well they are not necessary.
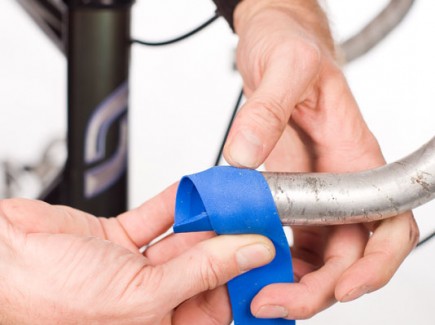
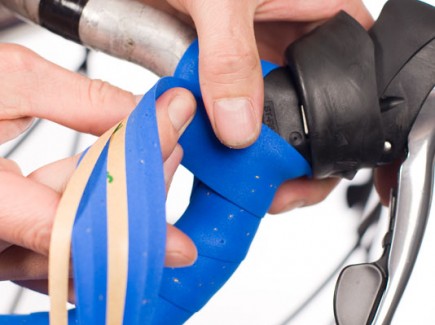
Start the wrapping process by leaving a centimetre or two of tape hanging off the end of the bar (4).
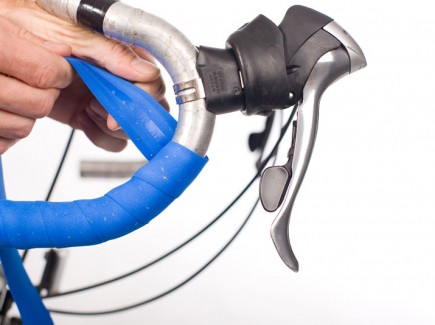
There are a number of schools of thought as to which direction you should wrap your tape. In our illustrations, we wrap clockwise at the beginning of the right-hand bar, as you stand behind the handlebar, continuing up on the drop, then reverse direction after the brake lever, wrapping in a clockwise direction on the top.
The reason why we recommend this style is that when you are gripping the drops, you tend to roll your hand outwards, away from you, which will tighten the tape. When you’re on the tops, you tend to roll your hands towards you, which will also tighten the tape given our reverse direction.
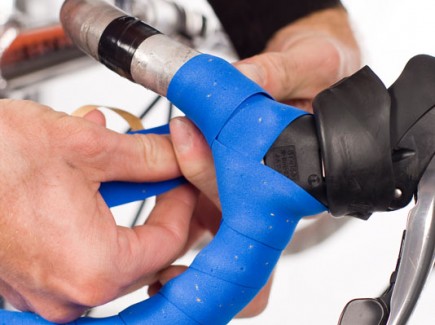
For the left handlebar you’d have to wrap the opposite way; first anti-clockwise on the drop, then clockwise on the top.
As you wrap, make sure all the adhesive strip is in contact with the bar and not sticking back onto itself, and try to keep an even tension (5). Use wider wraps at the beginning, as the bottom of drop bars don’t get used as much as the top and you don’t want to find you have run out of tape when you arrive at the centre of your bars!
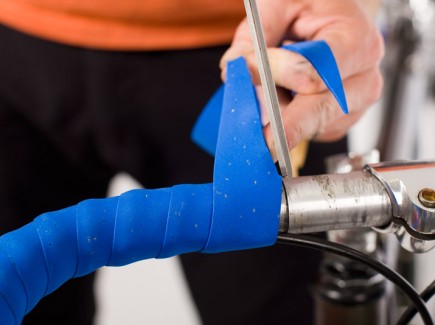
When you come to the brake lever, wrap close to its base, then up over its top (6), back down the inside, and under again(7). You have now reversed the direction of the wrap. Take the tape back up to the top, go under the bar, then over the top of the bar in an anti-clockwise direction (8), butnote that our image may be a bit deceiving here; the tape is about to be pulled under the bar and to the right of the picture.
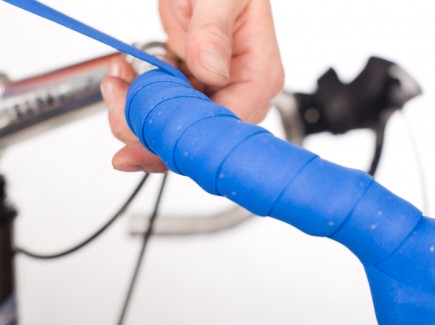
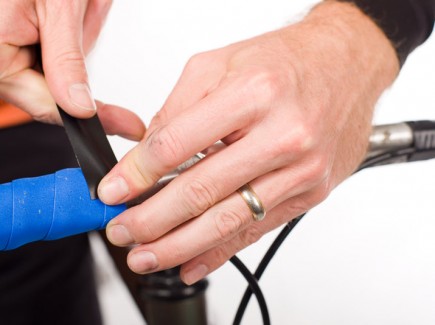
Continue wrapping in an anticlockwise direction (9). When you get to the centre, use a pair of scissors to trim the tape diagonally to a point (10) that will ensure you end the wrapping with a neat, flat edge, then wrap electrical tape over the finished ends to hold them securely down (11).
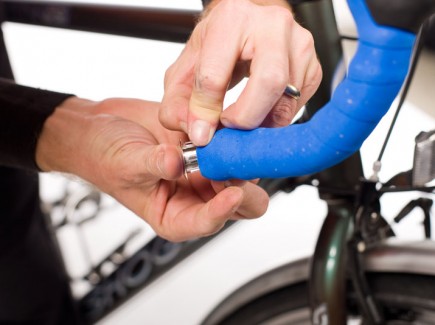
Pull the brake lever hood back down and, to finish off, fit the bar plugs, tucking the excess bar tape in for a secure fit (12).
Ride On content is editorially independent, but is supported financially by members of Bicycle Network. If you enjoy our articles and want to support the future publication of high-quality content, please consider helping out by becoming a member.


Great walkthrough!
A tip I’ve learned is that they make bar grip, which is just like bar tape but without the adhesive. So if you make a mistake (say wrapping the bars too tightly, running out of tape) you can simply unravel them and try again. It’s especially helpful if this isn’t something you do regularly…