

YourTube
There’s more to the humble inner tube than meets the eye, writes Stephen Huntley.

An inner tube seems like such a simple and straightforward bike part that very little is ever written or said about it. But it is an important component; there is more to the tube than meets the eye, and getting the right one for your bike is important.
Size it up
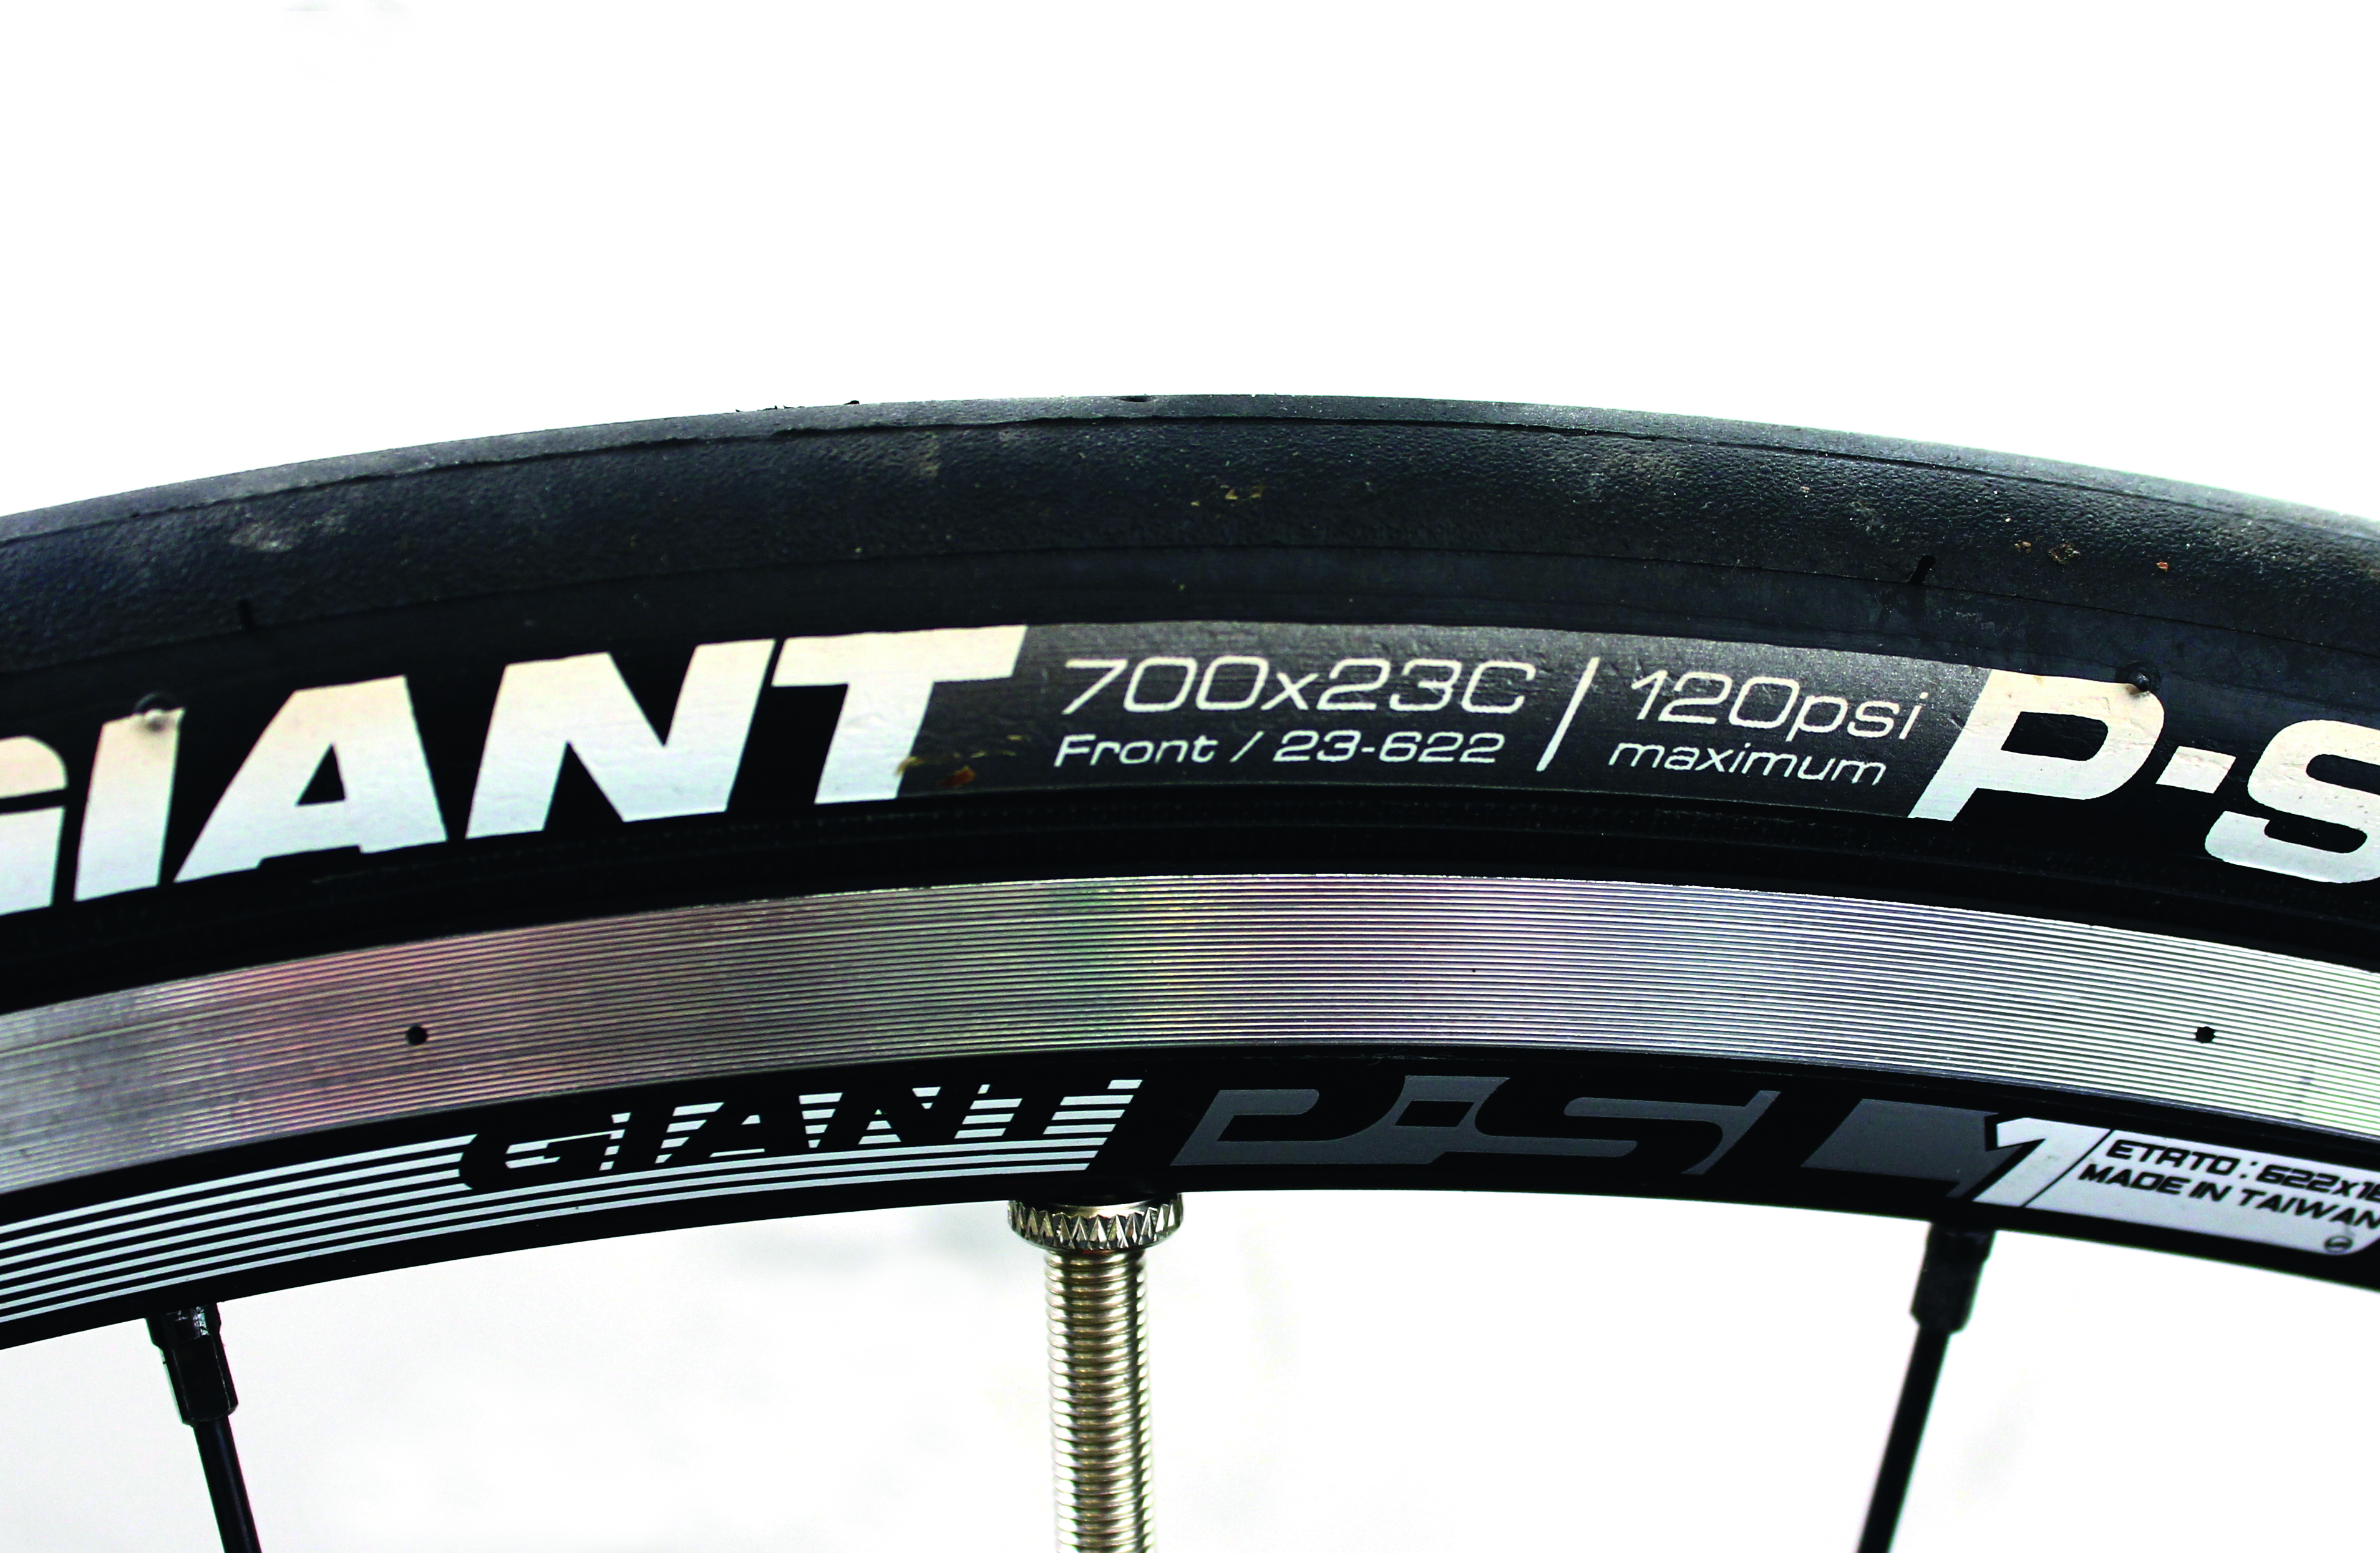
To work out the right size of tube for your bike, first look at the side wall of your tyre. Somewhere, often hard to find and very difficult to read, will be a written code for its size. On a road wheel, it will be something like 700x23C. This means the wheel diameter, including tyre, is 700mm, and the width of the rim is 23mm (ignore the ‘C’; it is no longer relevant). You may also see an additional number, ‘622’. That is an alternative measure of the wheel diameter (622mm), measuring it without the tyre attached.
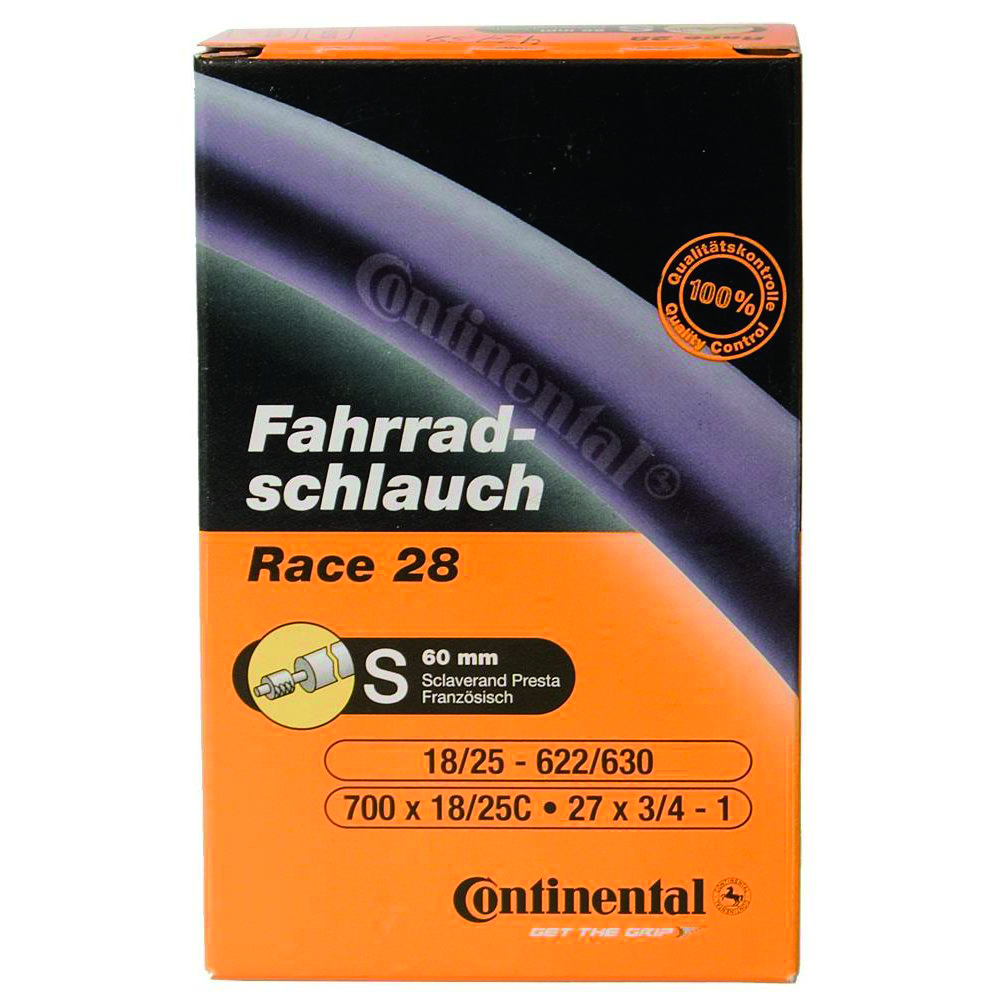
Inner tubes are sold to match the tyre diameter, but are flexible enough to fit a variety of widths. So, typically, you will see their packets marked with something like 700×18/25. That tube will fit a 700mm diameter tyre with a width anywhere between, and including, 18mm and 25mm.
Feel the quality
Most tubes are made of butyl rubber of varying thicknesses. You will pay more for very light, ‘racing’ tubes, or thick, more puncture-resistant tubes.
Tubes made of latex are also available. More expensive than butyl, latex tubes have slightly better riding characteristics as they are more flexible and adapt better to impacts. They are also a bit lighter, but are more permeable than butyl, so you’ll have to pump up your tyres more often.
You will also normally find two valve types on offer; the slim, long presta valve, and the shorter, stubbier schrader valve (schrader valves are also found on car tyres).
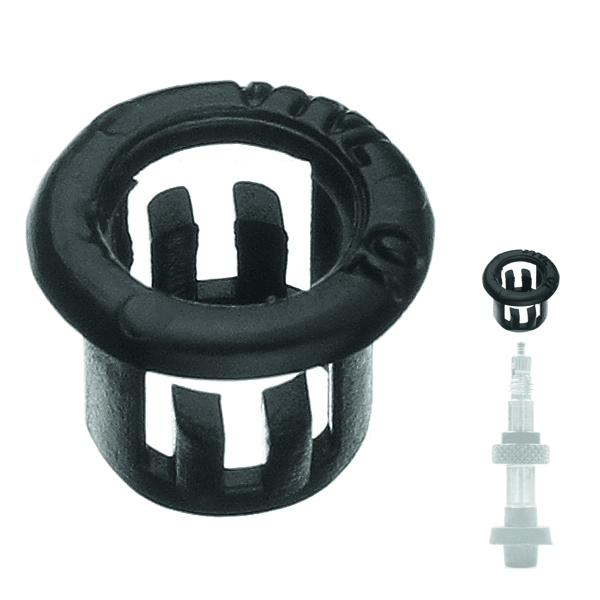
If you’ve been using schrader-valved tubes, you can, if you like, buy a presta-valved tube instead, but there is a chance the valve will rattle around in the larger rim hole while you ride. To prevent this happening, buy a rubber adaptor to fill the space.
Simply schrader
Because they can be blown up with a simple sports pump, and with a service station air hose, some people prefer the convenience and simplicity of schrader-valved tubes in their tyres.
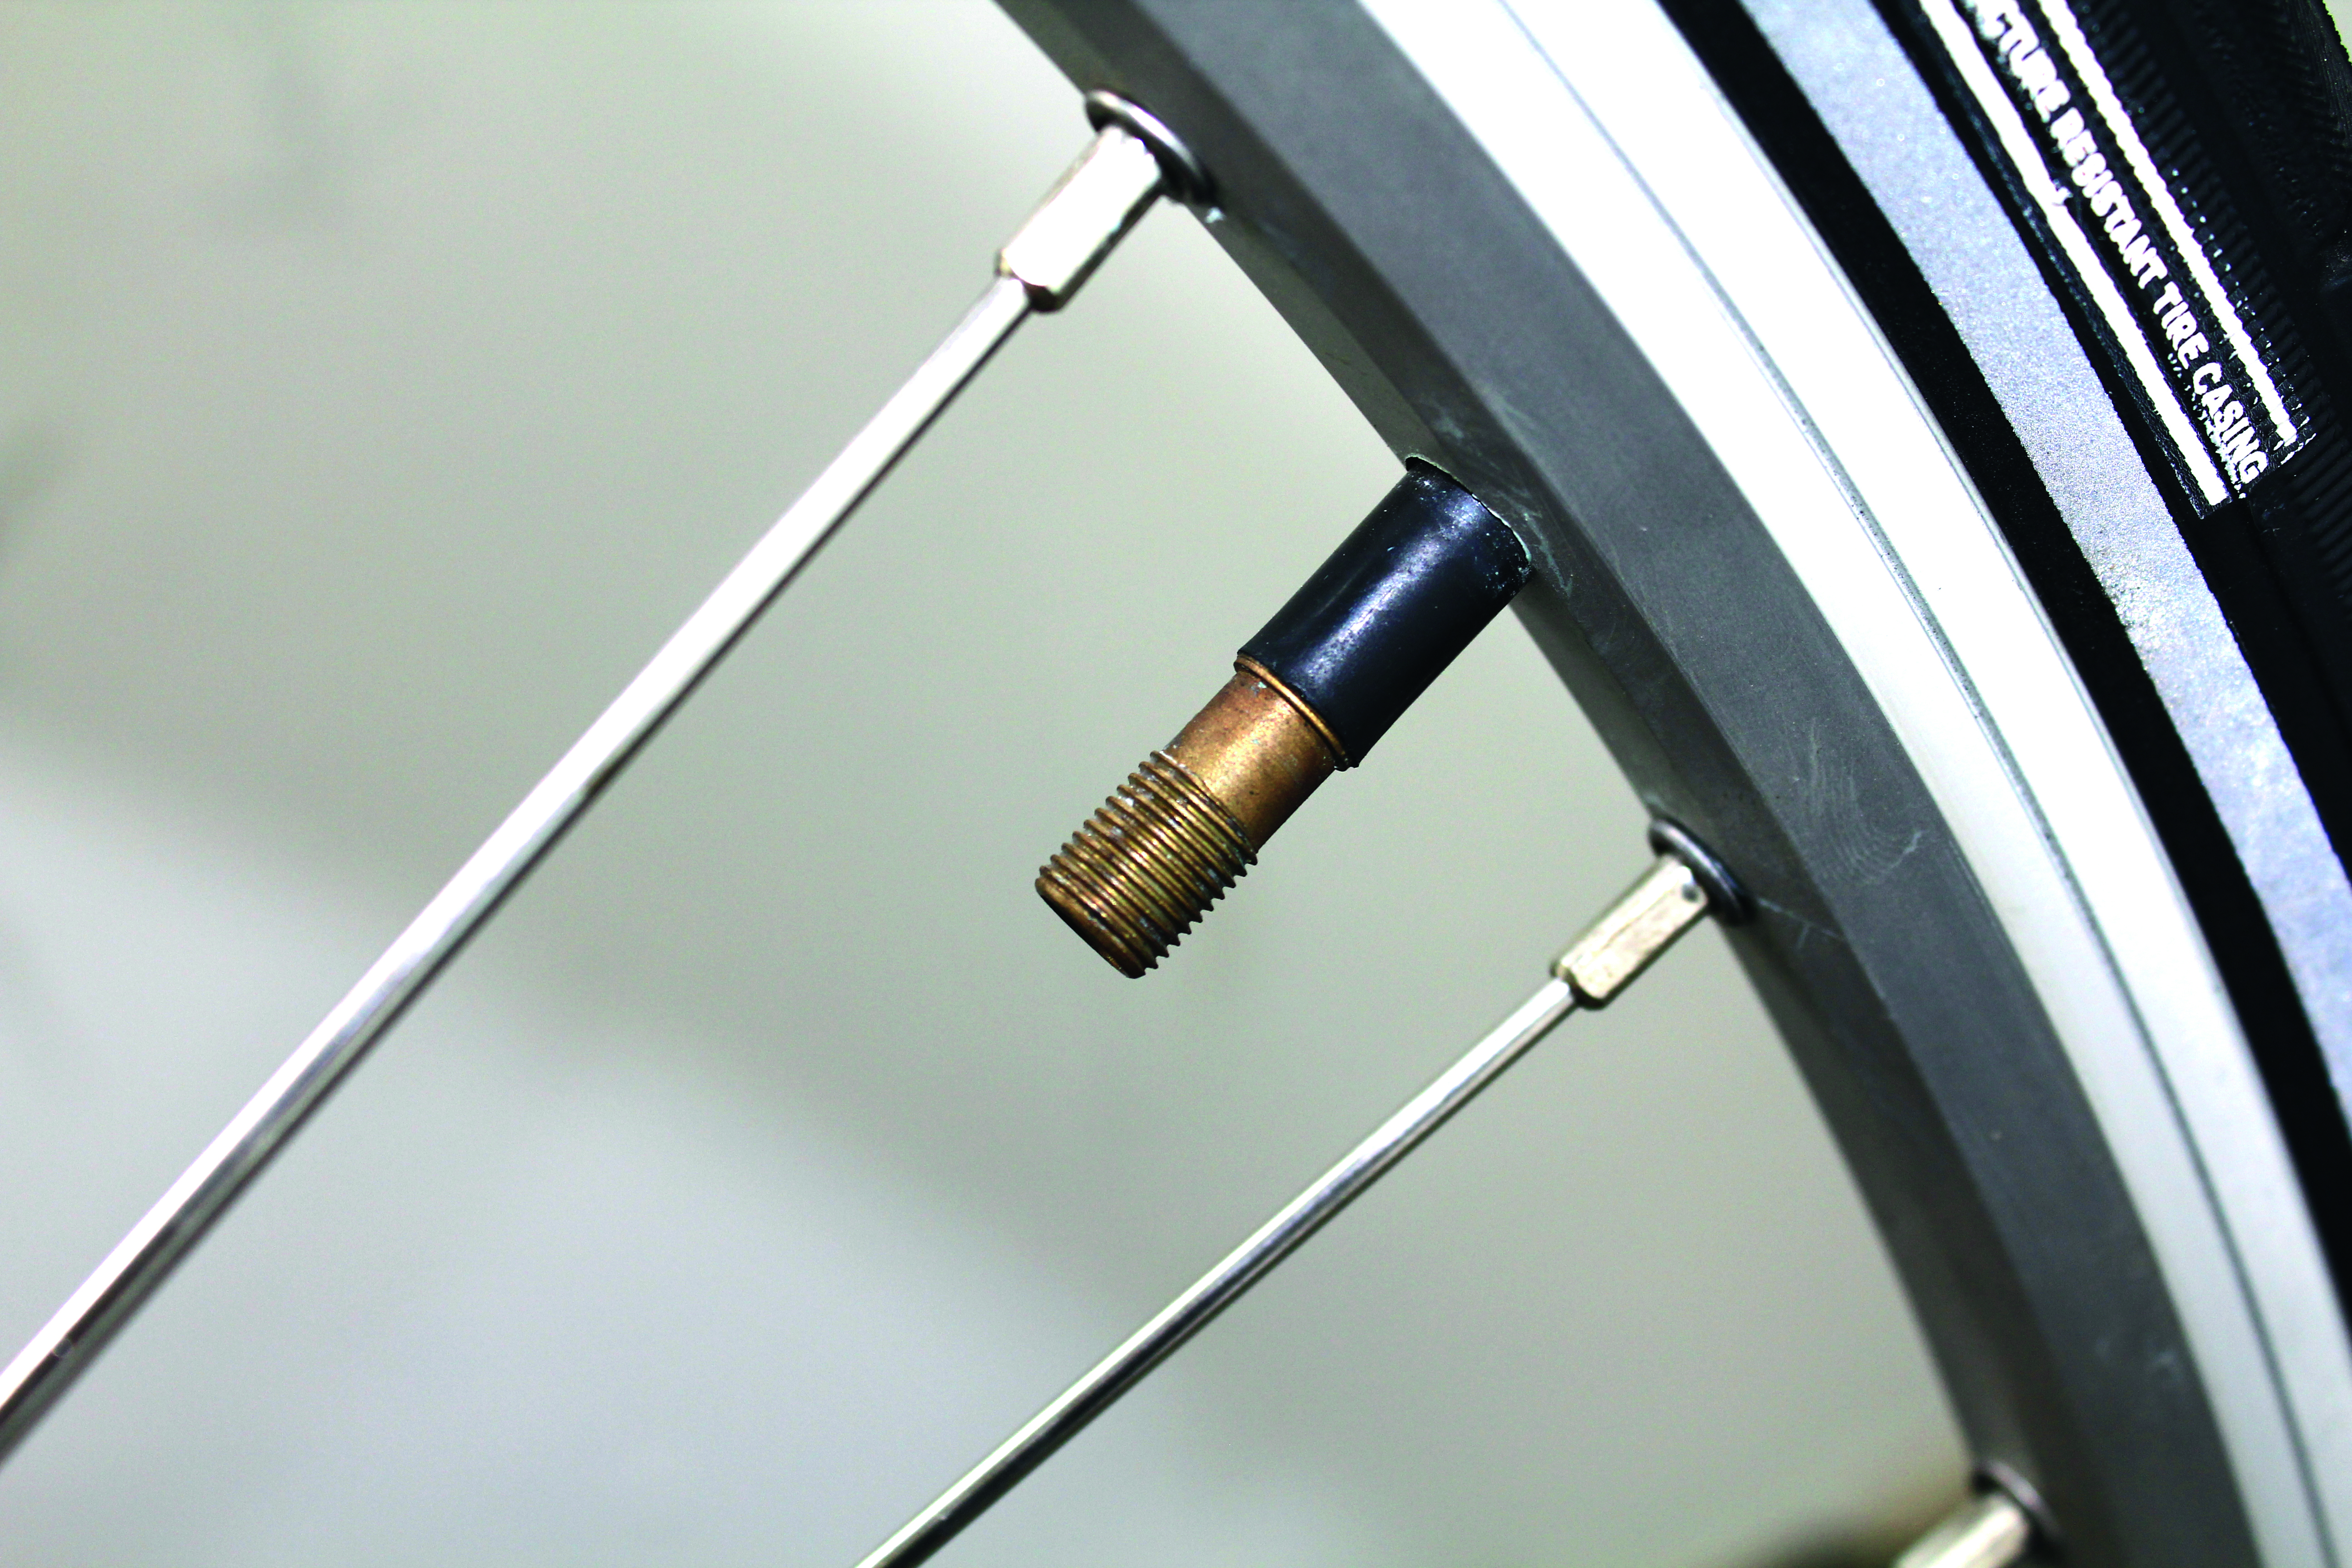
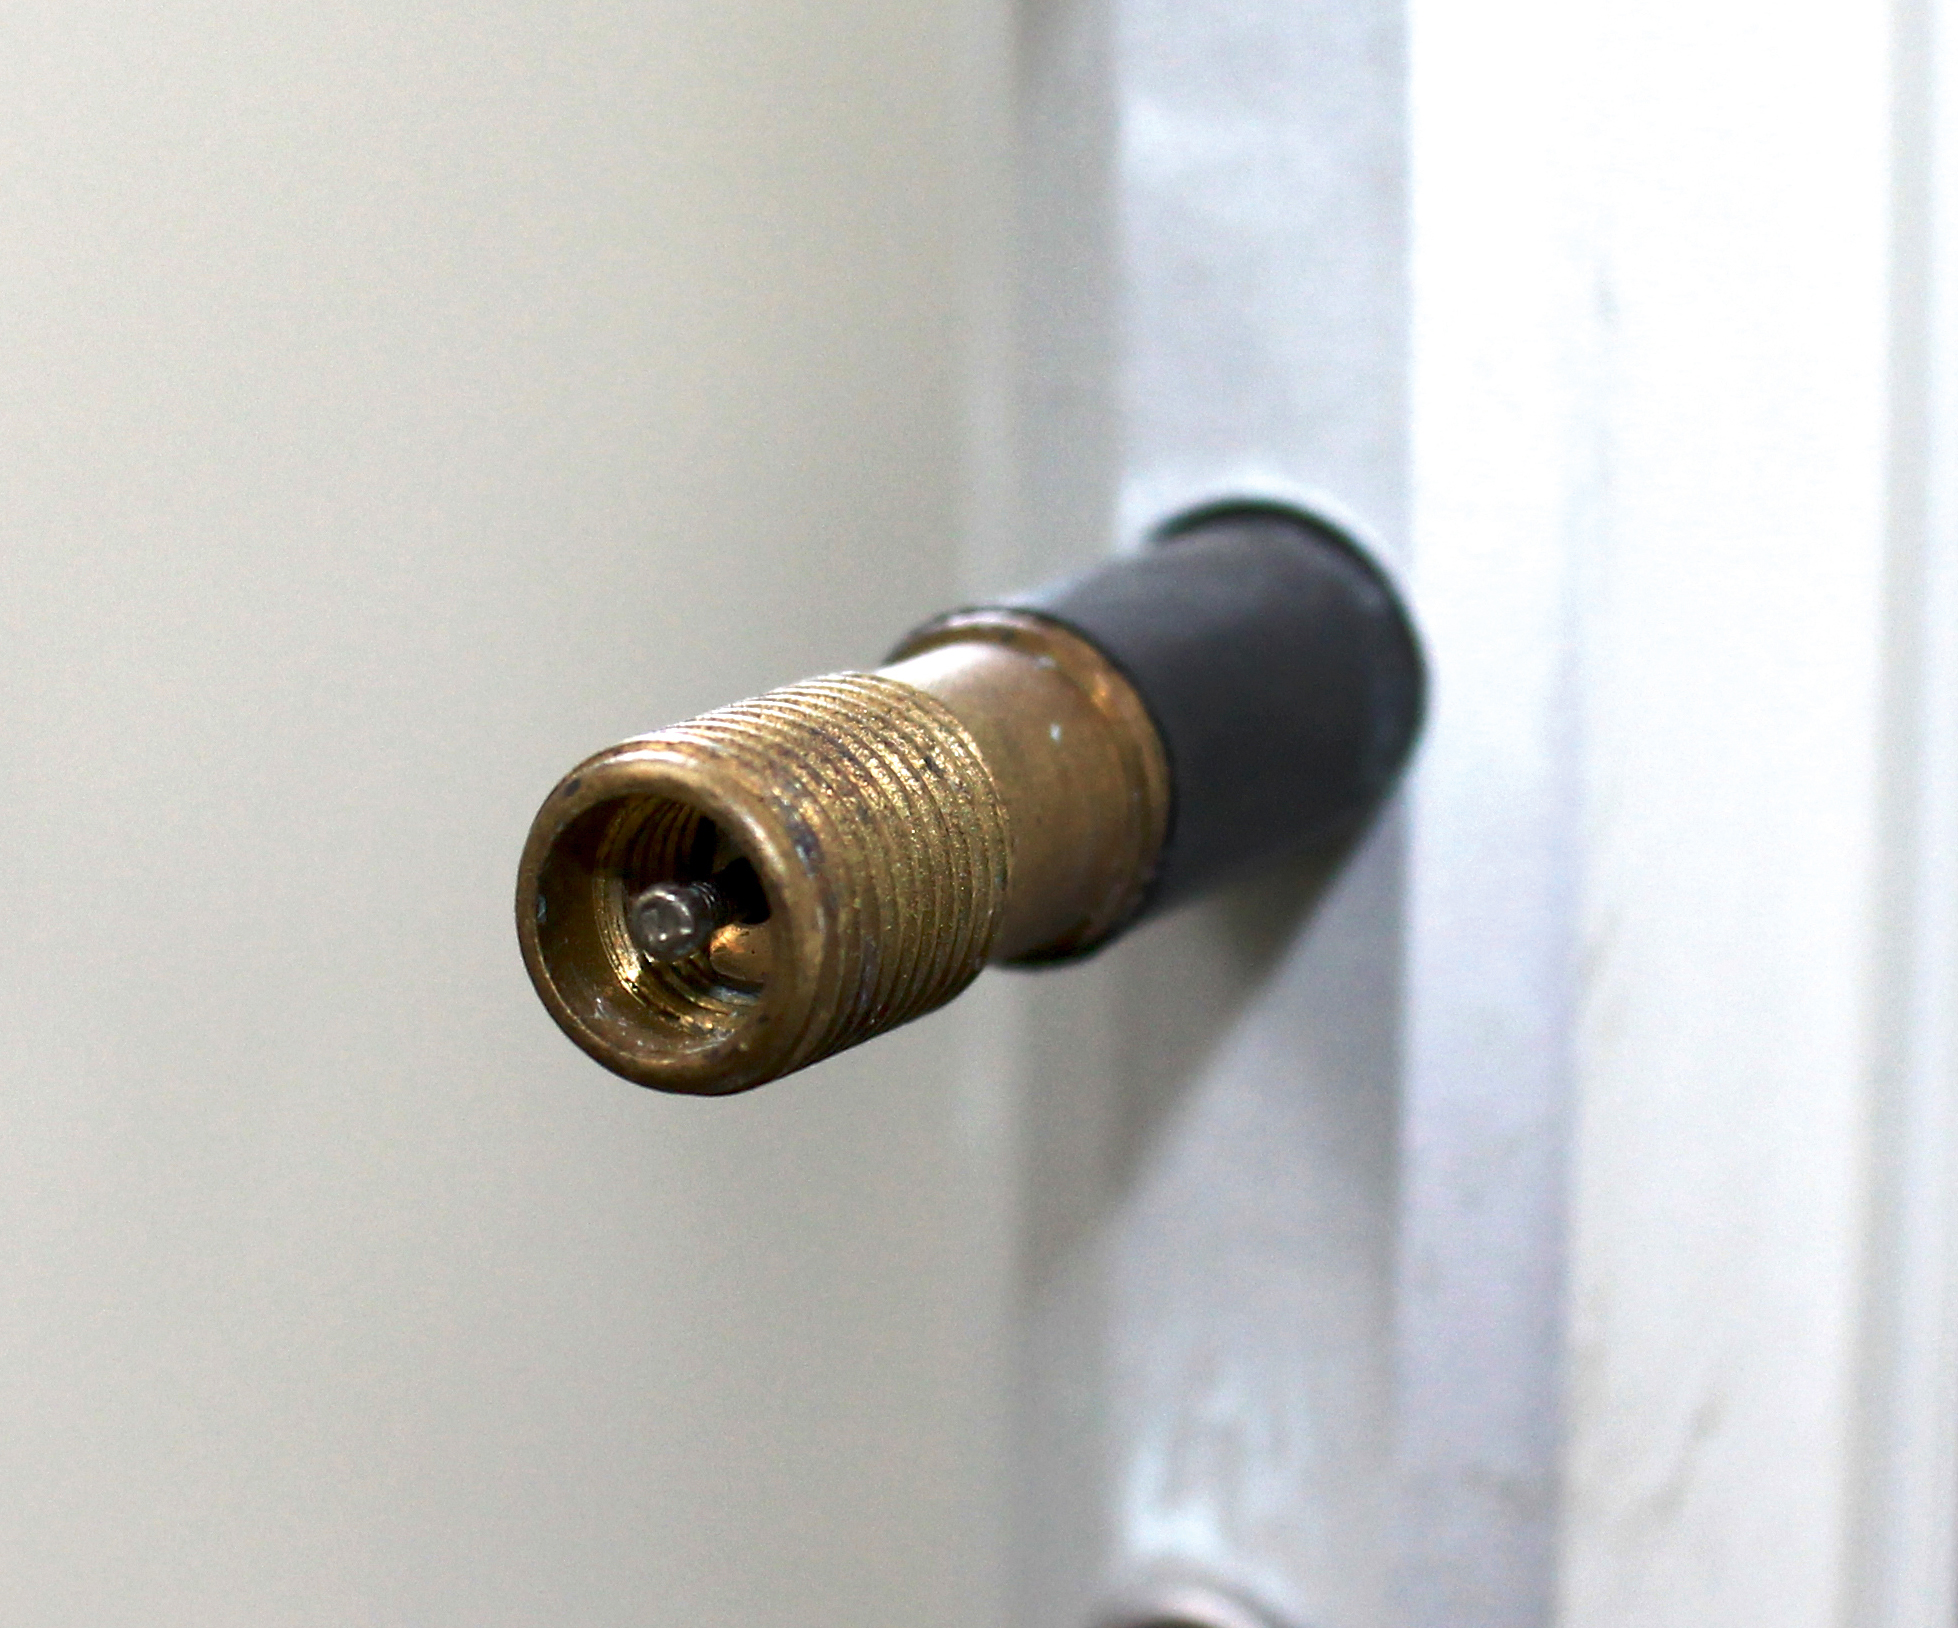
Schrader valves are essentially a hollow tube containing a valve core. The core can be screwed out with a basic tool and replaced, or tightened if it has become loose. The valve has a central pin which, when depressed, lets air in and out. When not depressed, an internal spring pushes the pin up, creating an airtight seal.
It is a good idea to keep an outer cap screwed onto the valve for protection. It will keep muck and water from getting in, which otherwise might erode or jam the valve mechanism. Schrader valves are seen as quite tough and hard wearing, and, unlike presta valves, are unlikely to break when using a small, handheld pump.
Hey presta
The small diameter of a presta valve means it is ideal for narrowrimmed wheels, whose structural strength may be compromised by a bigger valve opening. Presta valves are also traditionally seen as being better at holding the high pressure needed for fast road bikes, although many dispute this claim.
The presta valve is sealed from the inside through internal air pressure, making it easy to inflate, and easier to push in high air pressure from a handheld pump.
There is a nut at the top of the presta valve that is effectively a permanently attached cover. It needs to be unscrewed before air can be added. The nut remains loosely attached after unscrewing, and can be pushed in to deflate the tube.
Some riders leave the nut loose, and theoretically this won’t cause any great problems. But the closed nut will stop muck getting into the valve, and when closed, a separate valve cap is not necessary. However, having a valve cap is a good idea when carrying the tube as a spare, as it stops the valve end damaging the tube.
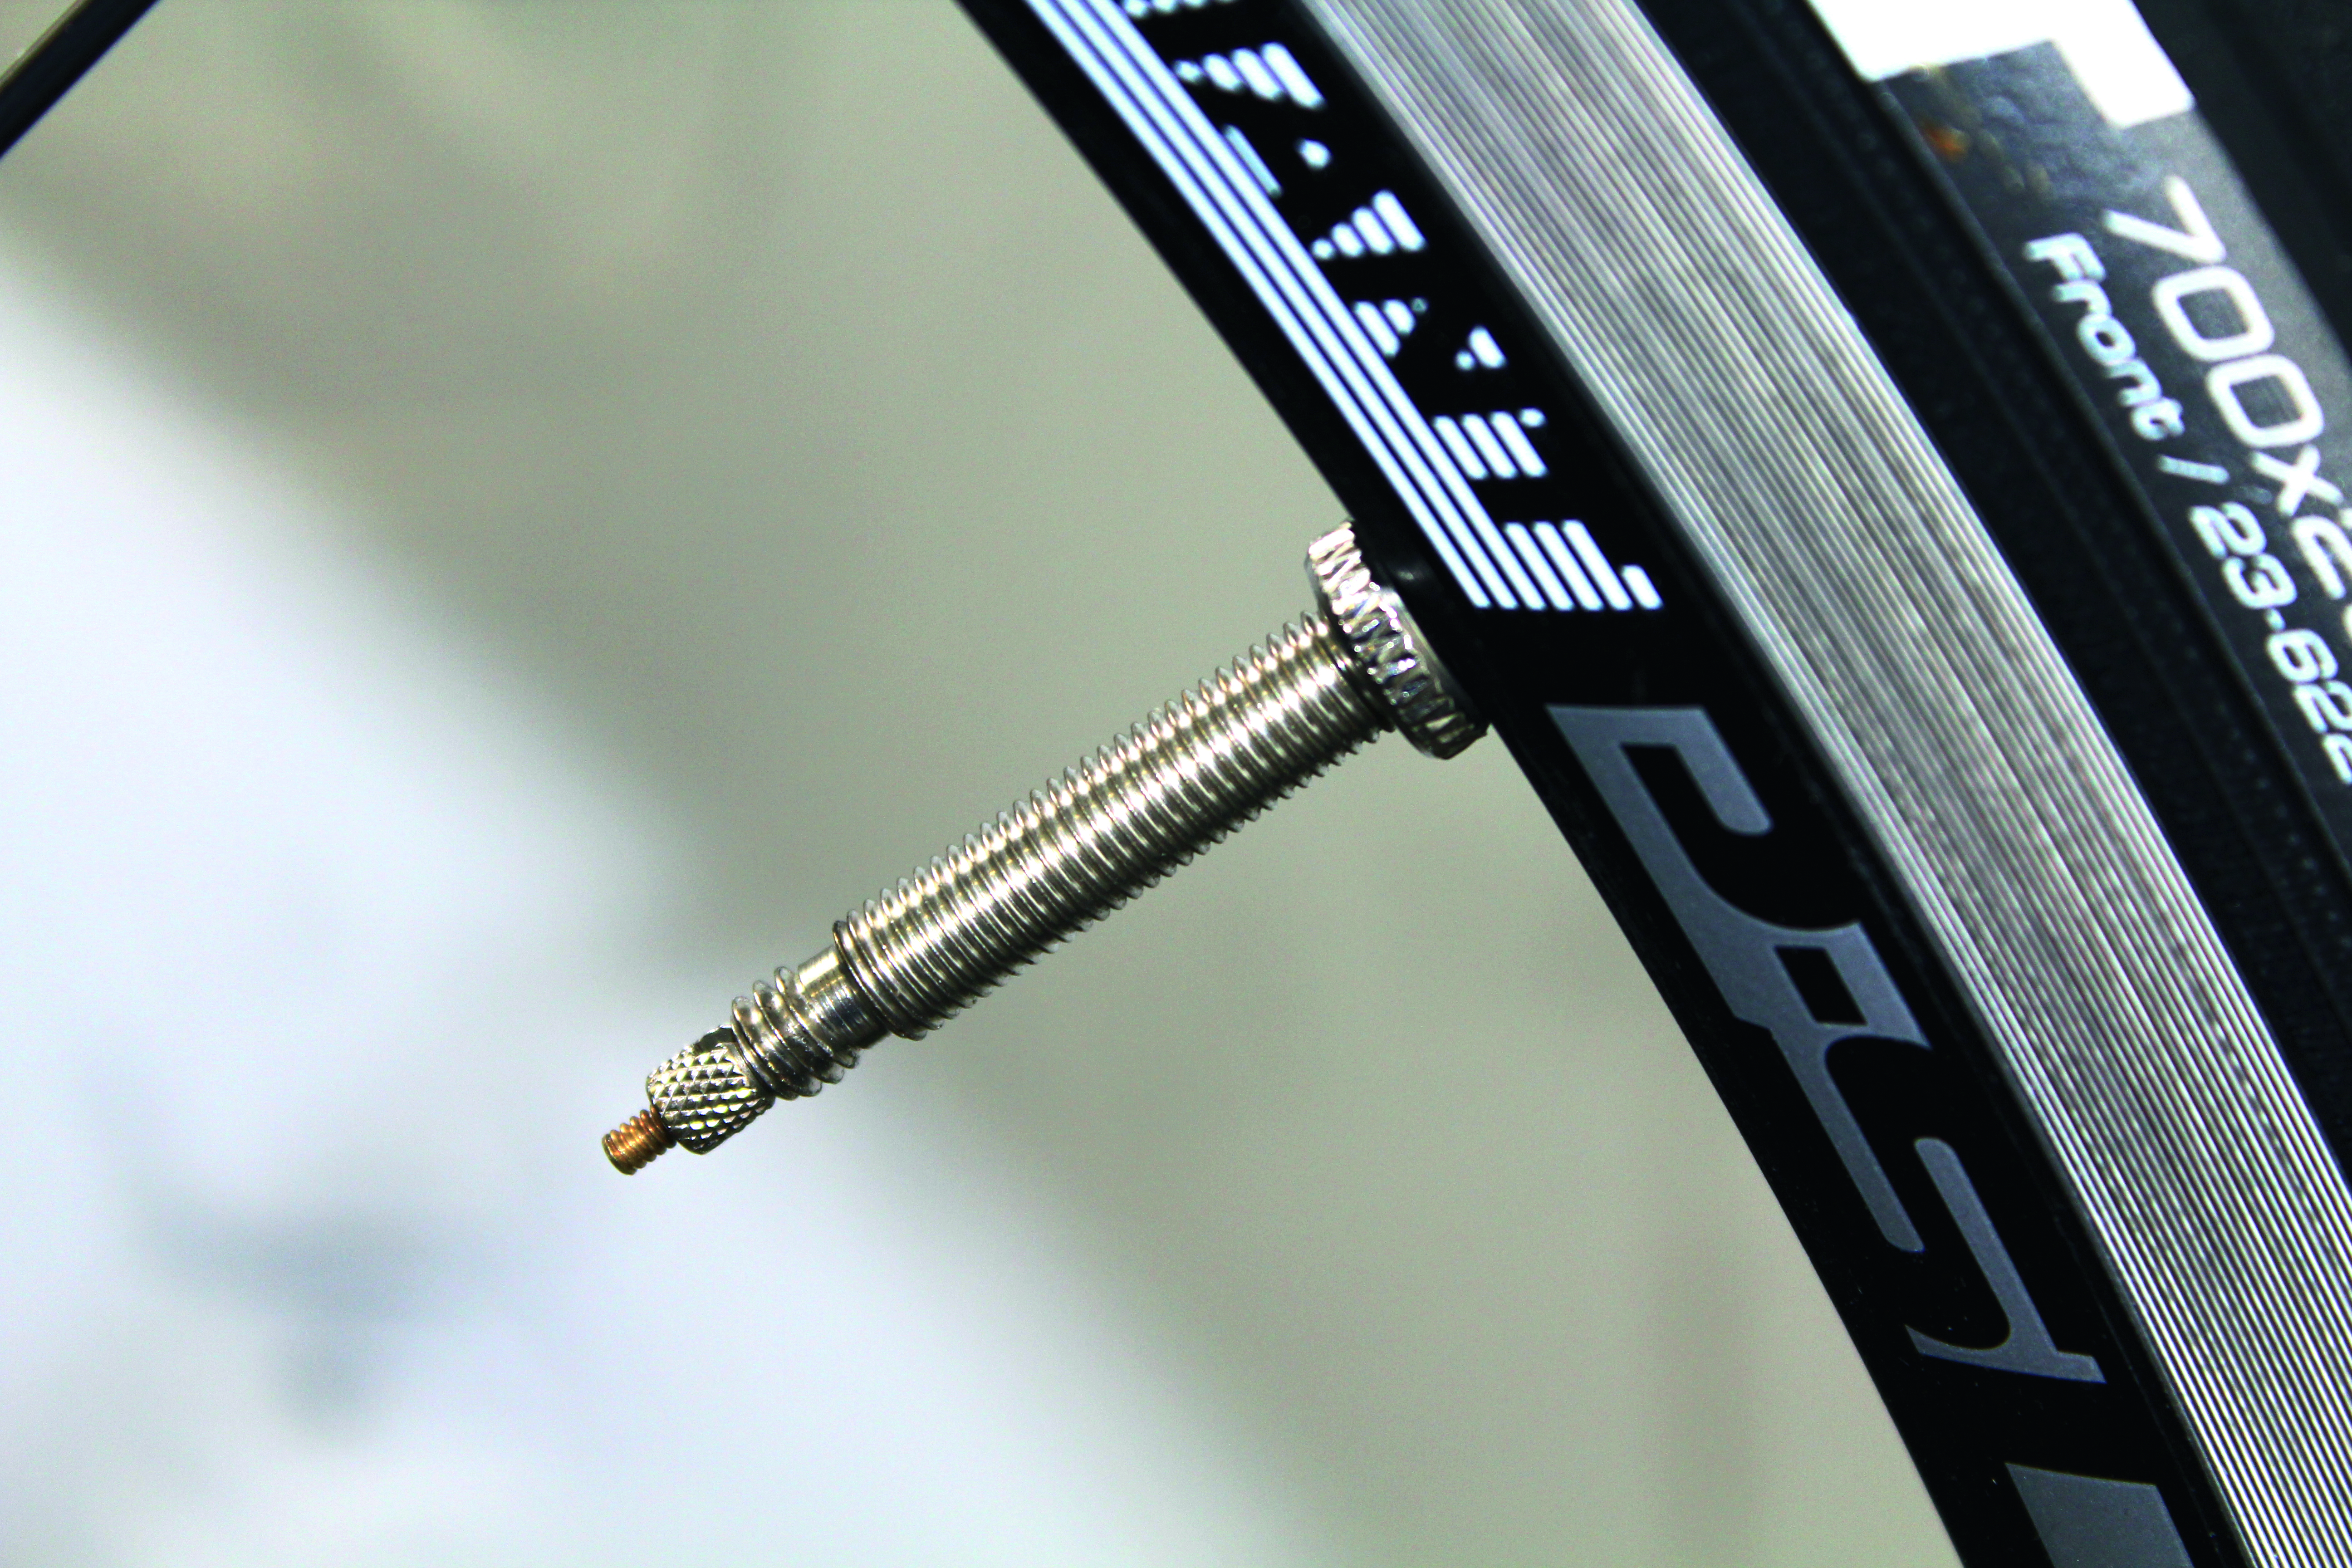
Presta valves come in varying lengths, and it is important to buy the right size to suit your rims. You will want enough of the valve standing proud of the rim to be able to get a good grip on it with your pump. But if the valve is too long, you are more likely to damage it when pumping, and some riders find they flap about at high speeds.
For standard wheels, a length of about 40mm is usually fine, but you can buy longer ones to fit rims with deep sections; valves of 50mm, 60mm and even 80mm are available.
Pumped up schraders
The pump head must press in a schrader valve’s pin before air can be pumped through. A screw-on pump hose will depress the pin as it is tightened. A clamp-on pump head will normally have a lever that, when pulled open, will cause an internal needle to press against the valve pin and open it up, ready to receive air.
When using a clamping pump, because a schrader valve stem is usually quite short, it can be hard to get enough purchase to engage the pump head. Try pushing against the back of the tyre to force the valve far enough out of the rim for the pump head to clamp on.
Pumped up prestas
Presta valves come with a slim collar that screws down towards the rim. Some riders ditch this collar with little consequence, but it does serve a purpose.
Make sure you take the collar off before putting your tube into the tyre, then before attaching the pump head, screw the collar down very lightly against the rim. When attaching the pump the collar will stop the valve disappearing into the tyre. Be careful not to over tighten this collar; you may end up pulling the tube into the valve hole, leading to a tear.
Before attaching the pump, unscrew the nut on the top section of the valve. Depress this nut down quickly once, which will let a little bit of air escape, but will help loosen up the valve seal (called ‘burping’ the valve).
Some pump heads with hoses will simply screw onto the top of the valve, but most need to be gently pushed down over the top of the valve and its loosened nut, then clamped on by pulling back on a lever.
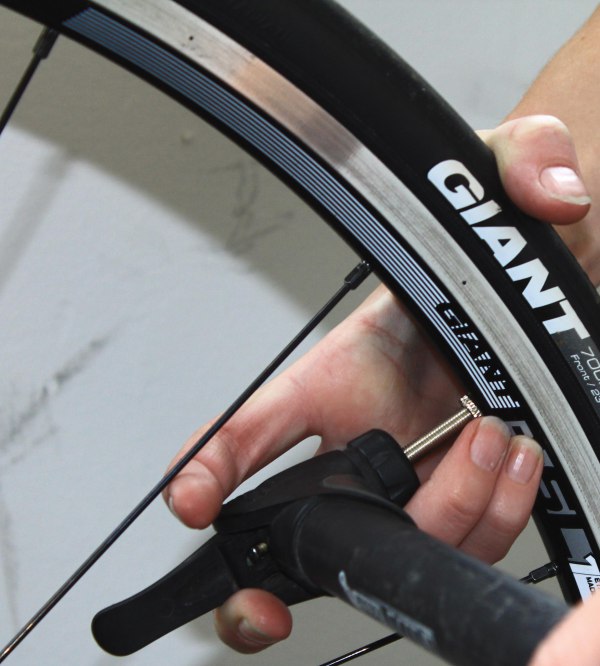
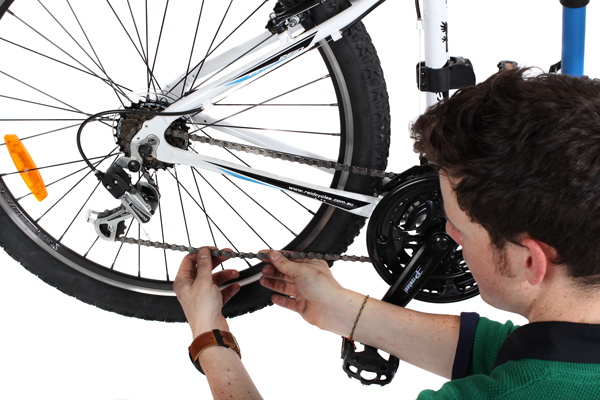
When pumping in air using a handheld pump with no hose attachment, try to grip the head of the pump and the wheel in one hand, while pumping with the other (see main picture); it is awkward to do, but if you don’t use this technique, a vigorous pumping action may bend the valve stem.
When you’ve finished pumping, grip the wheel and valve stem with one hand to keep it stable while gently removing the pump head, then screw the upper nut back in.

Handy extras
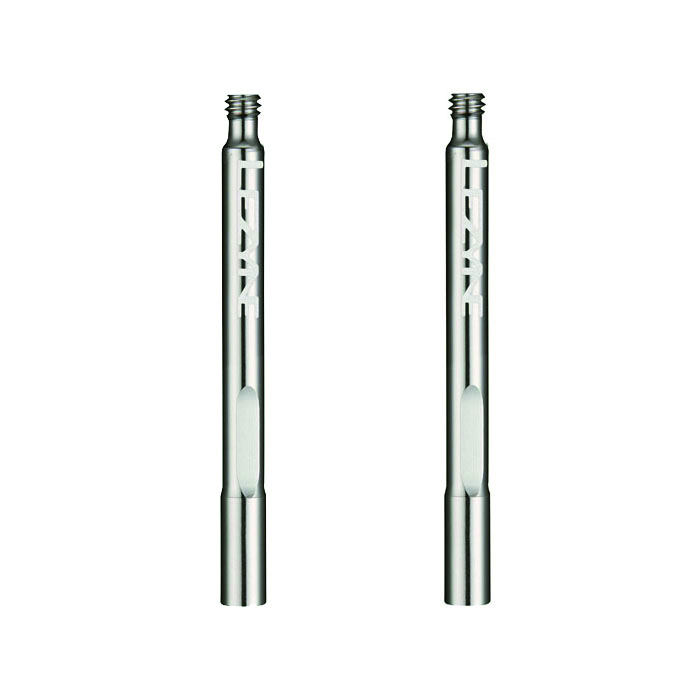
If you use presta tubes, valve extenders are a useful item to have in your kit. You can then buy more easily attainable and cheaper, shorter valves, and use the extenders when using a pump. The most basic extenders simply screw on to the existing valve. Extenders are also handy for emergency situations where you need to borrow/buy a tube and the valve length available doesn’t reach completely through your rim.
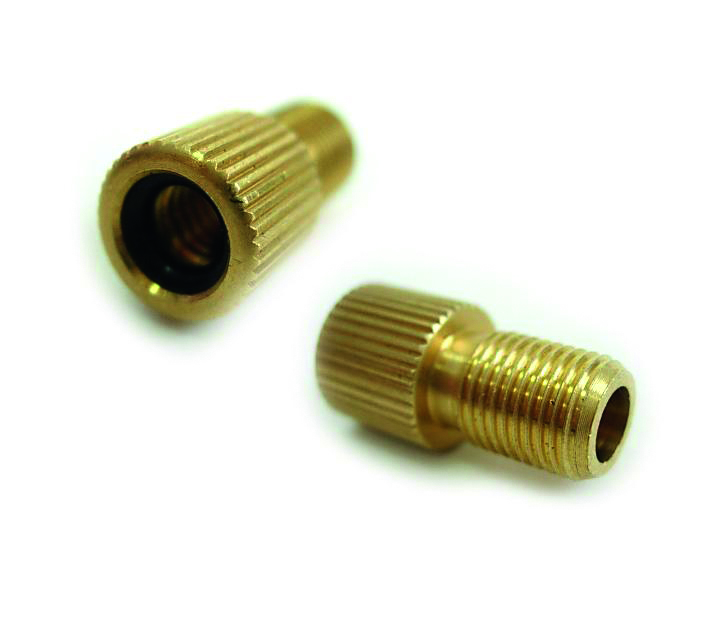
Another handy buy is a simple adaptor that allows a presta valve to accept a schrader pump head. The adaptor may save you a long walk if the only working pump available is a service station air hose, or a schrader-specific pump.
 |
 |
 |
| Rubber adapter for a presta valve fitted in a schrader rim | Presta valve extenders | Adjusters that allow presta valves to accept schrader pump heads |
Ride On content is editorially independent, but is supported financially by members of Bicycle Network. If you enjoy our articles and want to support the future publication of high-quality content, please consider helping out by becoming a member.
Bad idea to skim over BSD of rims, especially now that there is 29″ers and 650B (what *does* that letter mean anyway?) around. I’d consider rewriting this bit.
Splurge a bit if you are buying Presta tubes and get the ones with removable valves. You can remove the valve and add 10 ml to 20 ml of your favorite tubeless tire sealant. That will help you stop most pinch and pinhole punctures.
And to the weight weenies who leave their flat tubes littering the road because it would kill them to carry an extra 50g home: thanks for the spare tubes, you muppets.
10¢ worth of patch and it’s as good as new. I haven’t had to buy a new tube for years.